

How to Set Up IPDEEP Proxies in MoreLogin



Clean IP picks: Static IPs from $1.5 each, Dynamic IPs from $0.5/GB


All IPDEEP proxy products require an internet connection outside mainland China. Customers must set up this connection themselves.
This tutorial assumes that an internet connection outside mainland China is already in place.
Setting Up IPDEEP Proxies
Follow these steps to create an IPDEEP account, purchase a proxy, and find your connection details.
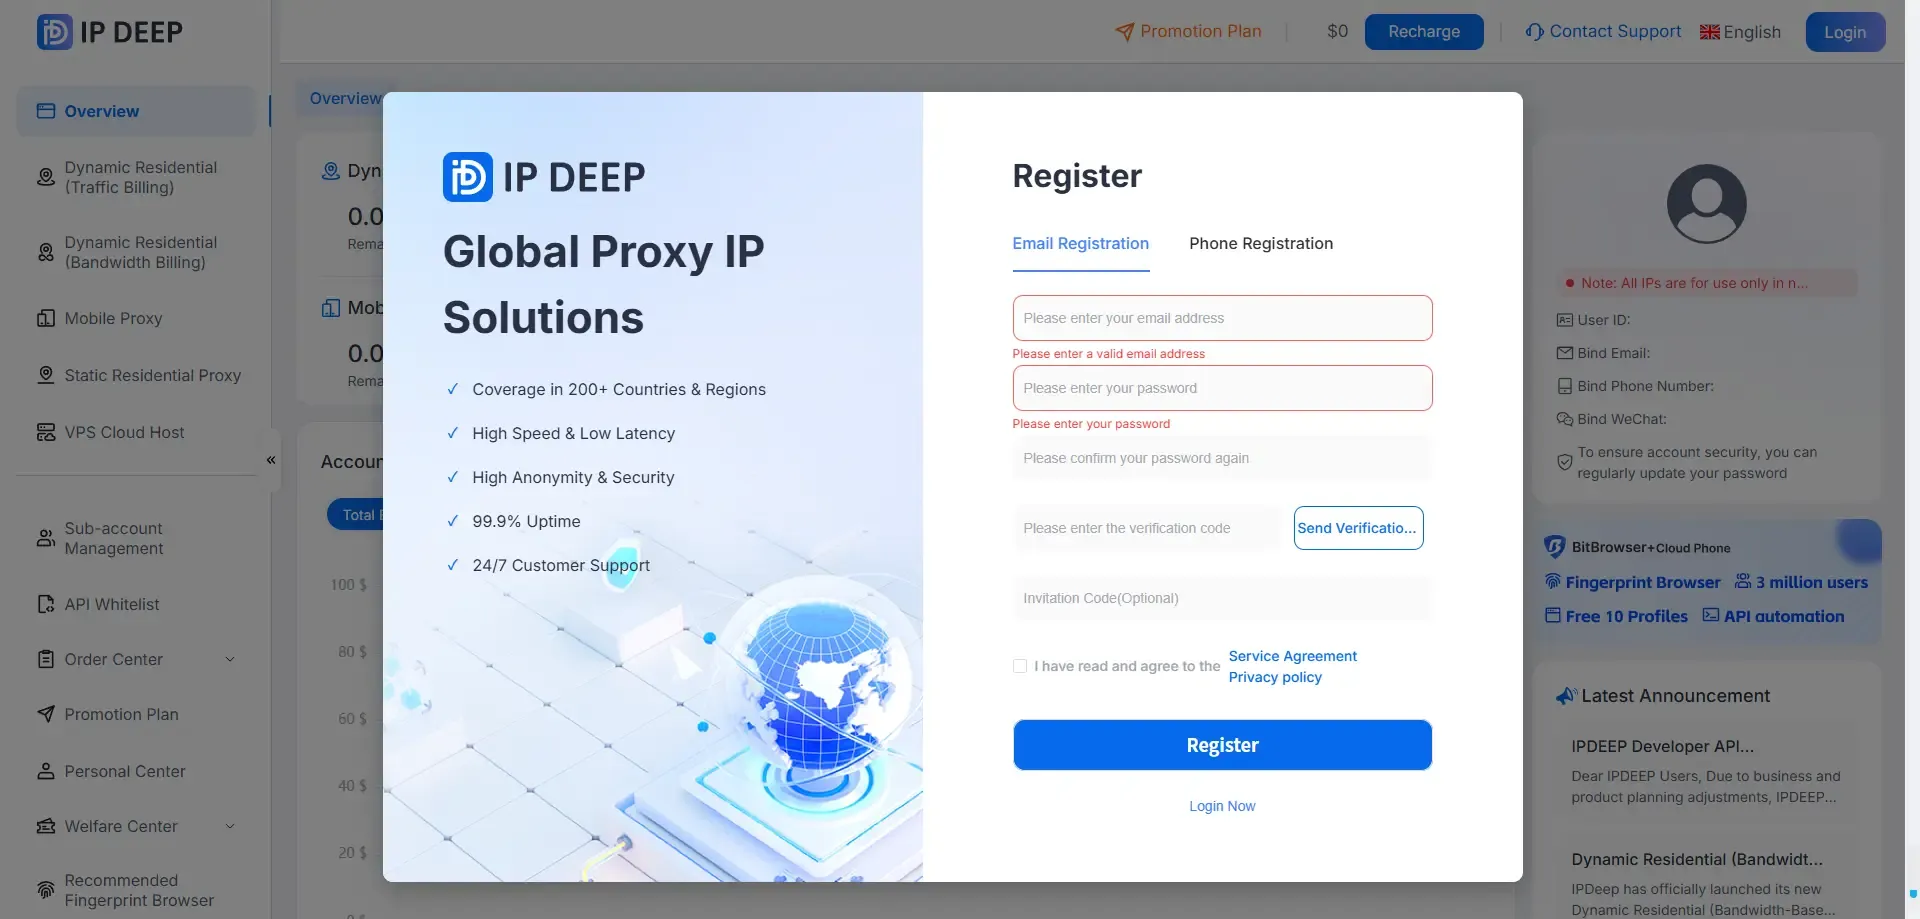
1. Create an IPDEEP Account
Visit the official IPDEEP website and sign up using your email address, Google account, or phone number.
2. Sign In and Choose a Proxy Type
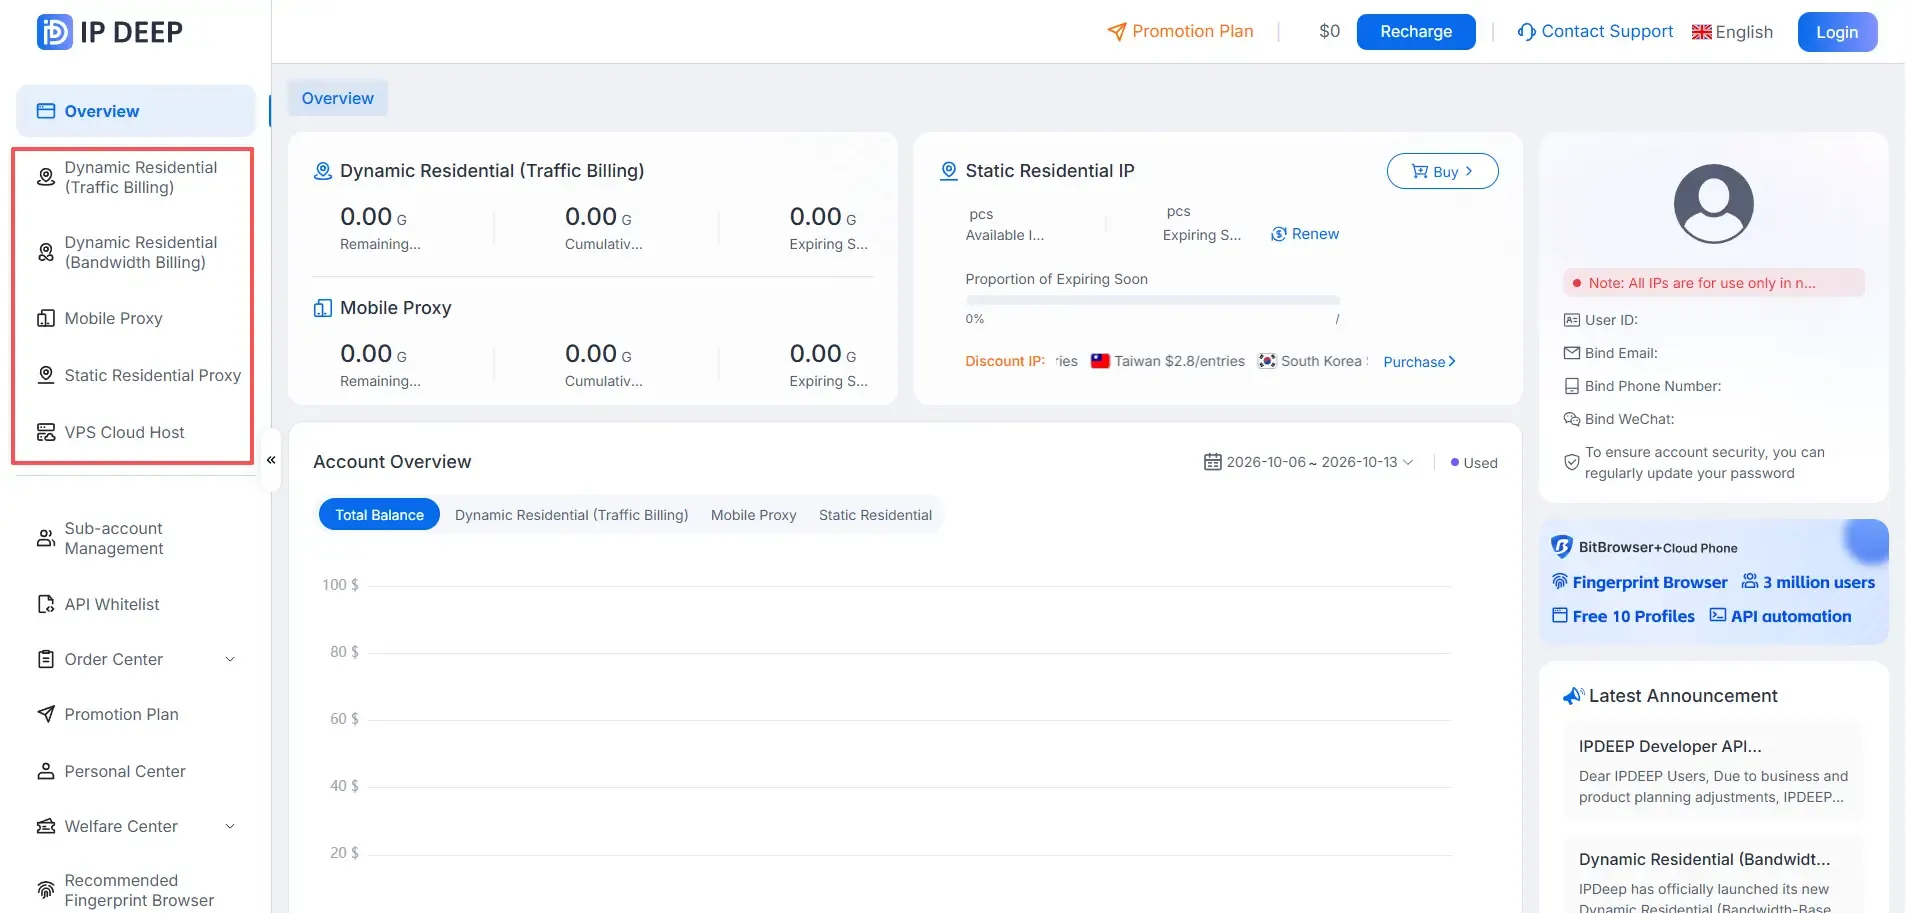
Sign in to the dashboard and select the type of proxy you want to buy.
IPDEEP offers static residential, rotating residential, unlimited residential, and mobile proxies.
3. Claim Your Account Reward
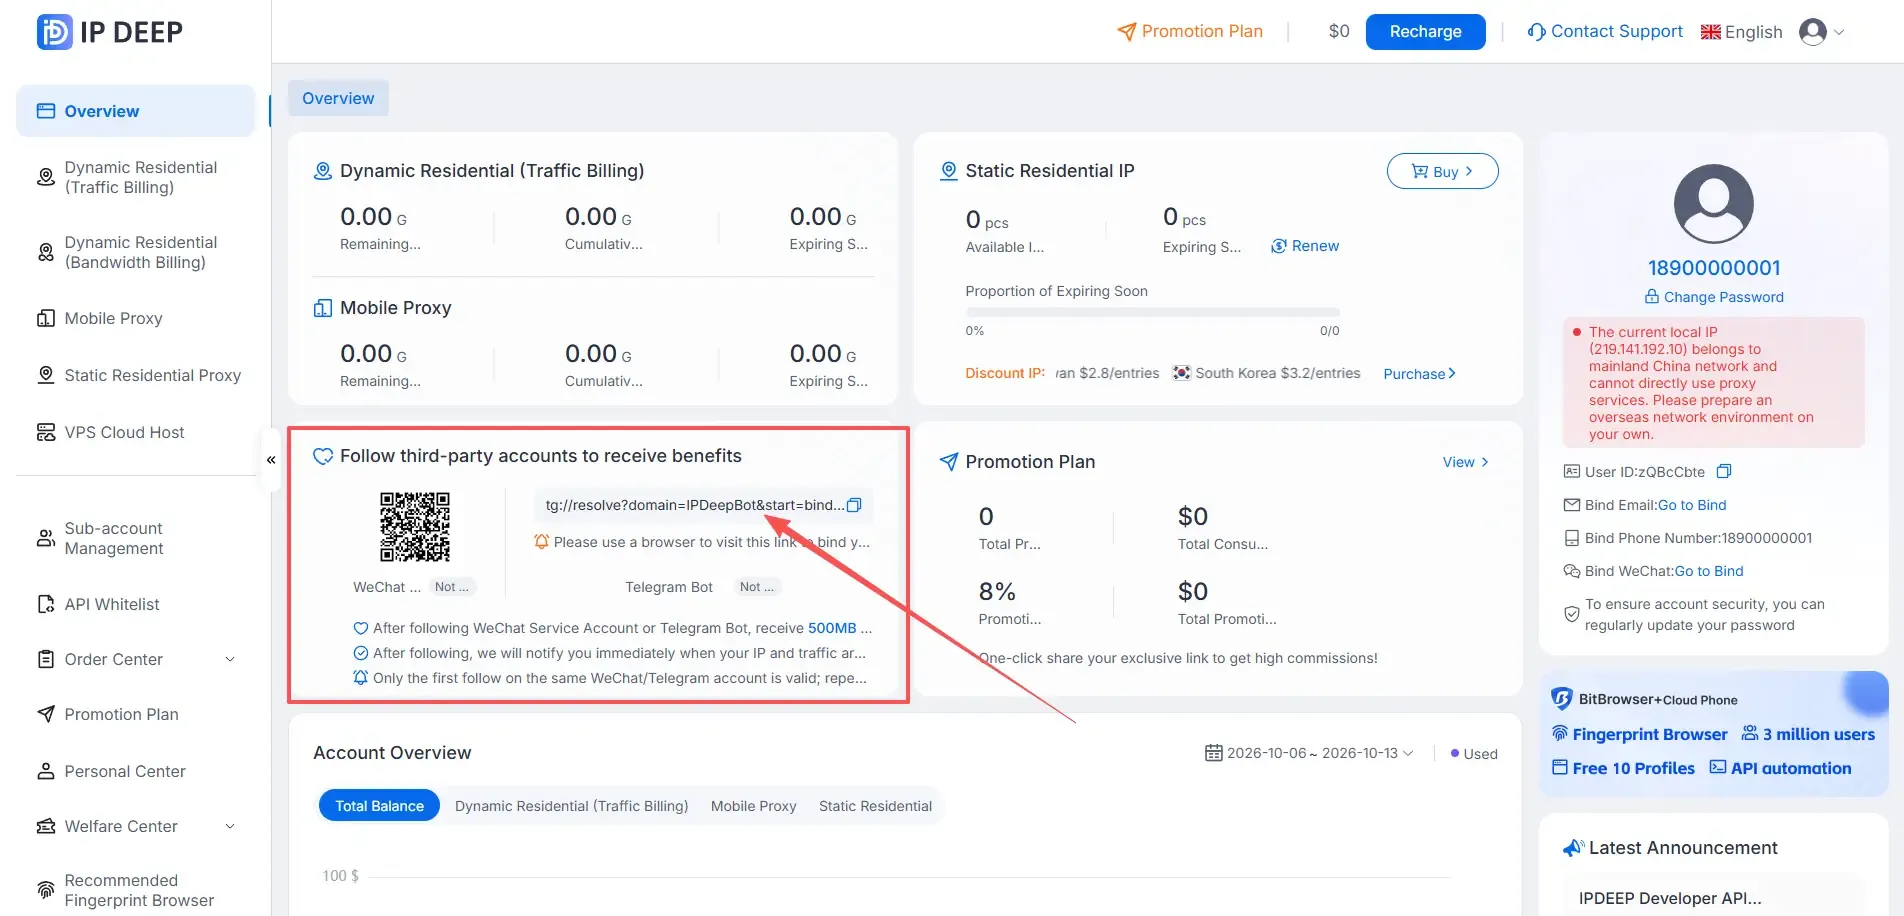
Sign in and follow IPDEEP’s WeChat service account or connect with its Telegram bot to claim 500 MB of rotating proxy traffic or a $2 voucher. You can apply the voucher to a proxy purchase.
4. Buy a Static Residential Proxy
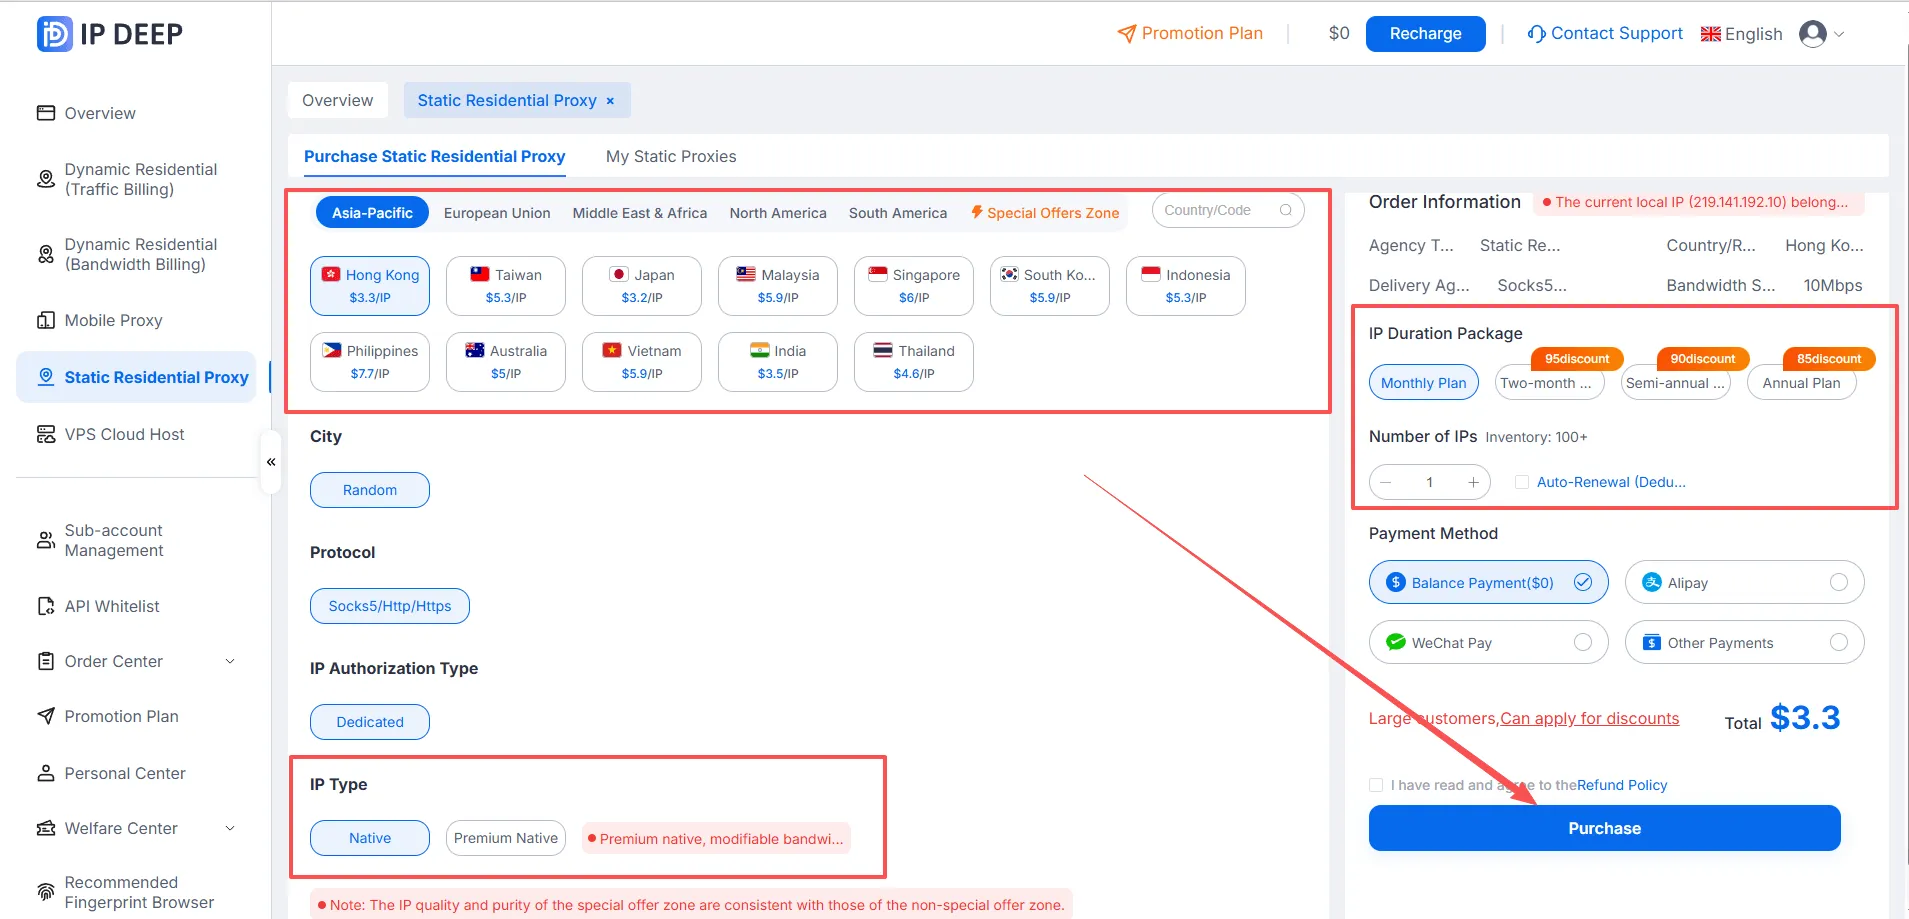
For a static residential proxy, select the country or region > choose the IP type (Native or Premium Native) > select the subscription period > choose a payment method > click Buy.
5. Get Your Proxy Connection Details
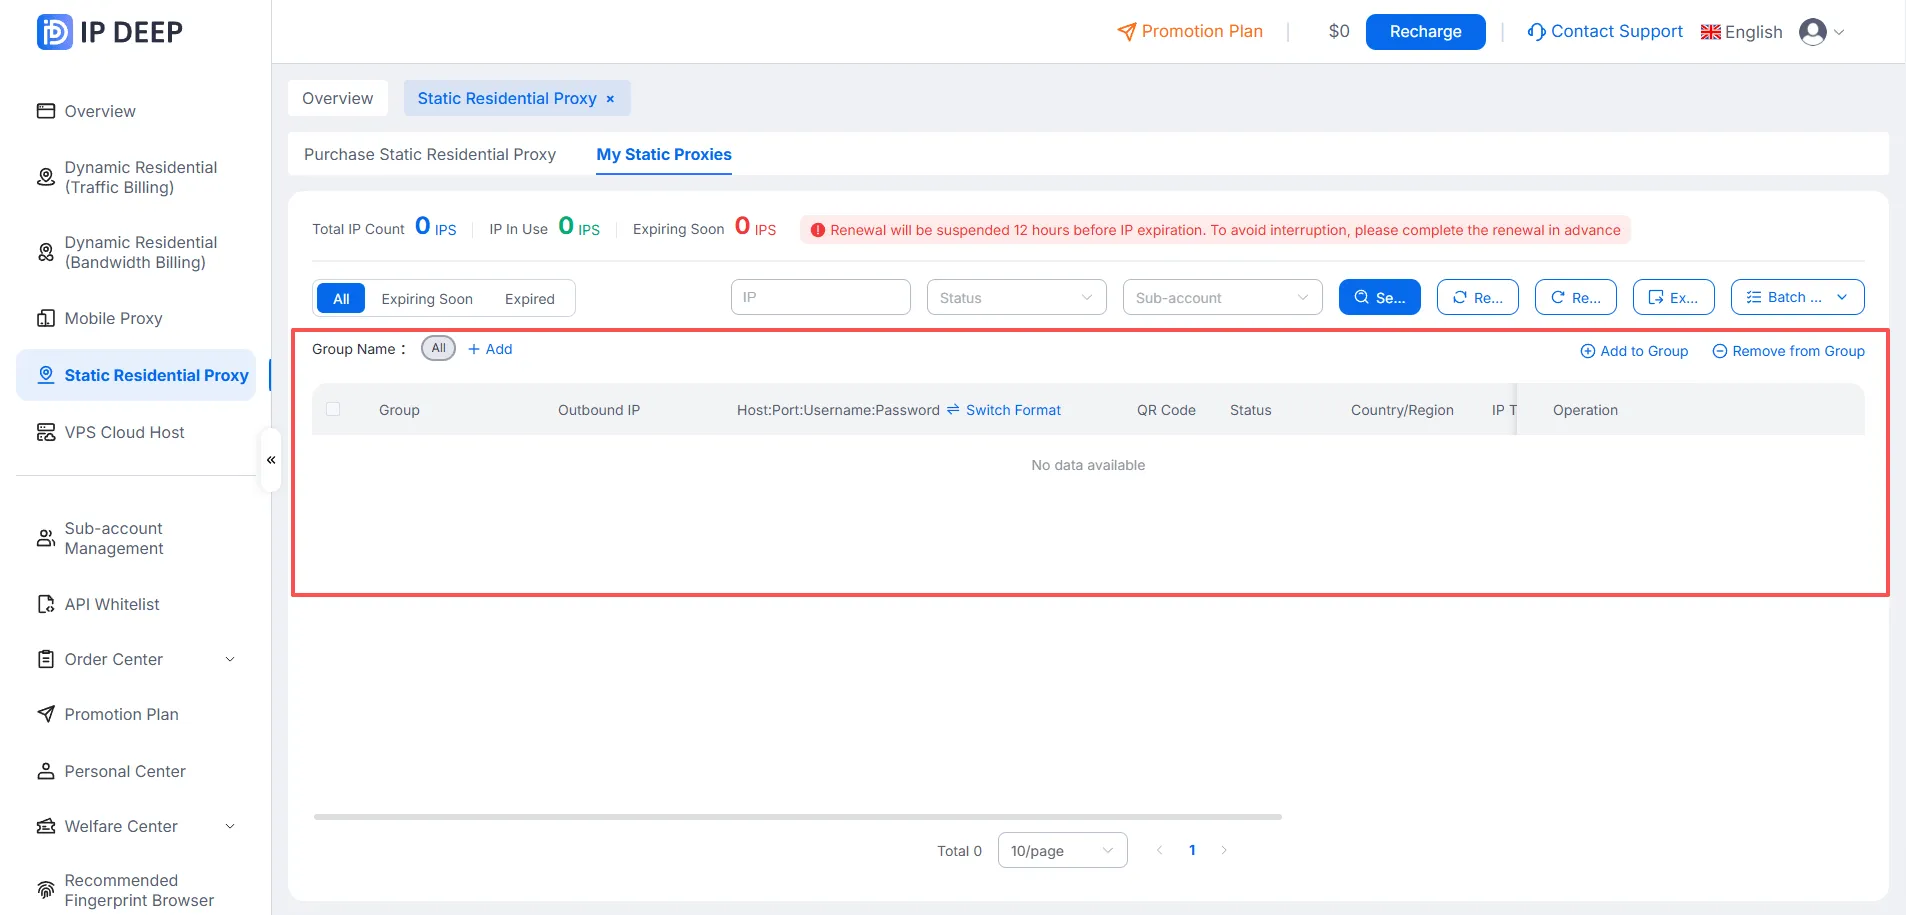
After purchase, open the Purchased Static Residential Proxies page to find your connection details in Host:Port:Username:Password format.
You now have the details you need to connect. The same basic process applies to other proxy types.
Configuring Proxies in MoreLogin
1. Sign Up and Download MoreLogin

2. Add a Browser Profile and Set Up the Proxy
After installing MoreLogin, create a browser profile and enter your browser and proxy settings. Run the connection check and save the profile once the test passes.
2.1 Open the MoreLogin app and create a new browser profile. To update an existing profile, hover over it and click Edit. Enter a profile name and fill in the other settings as needed.
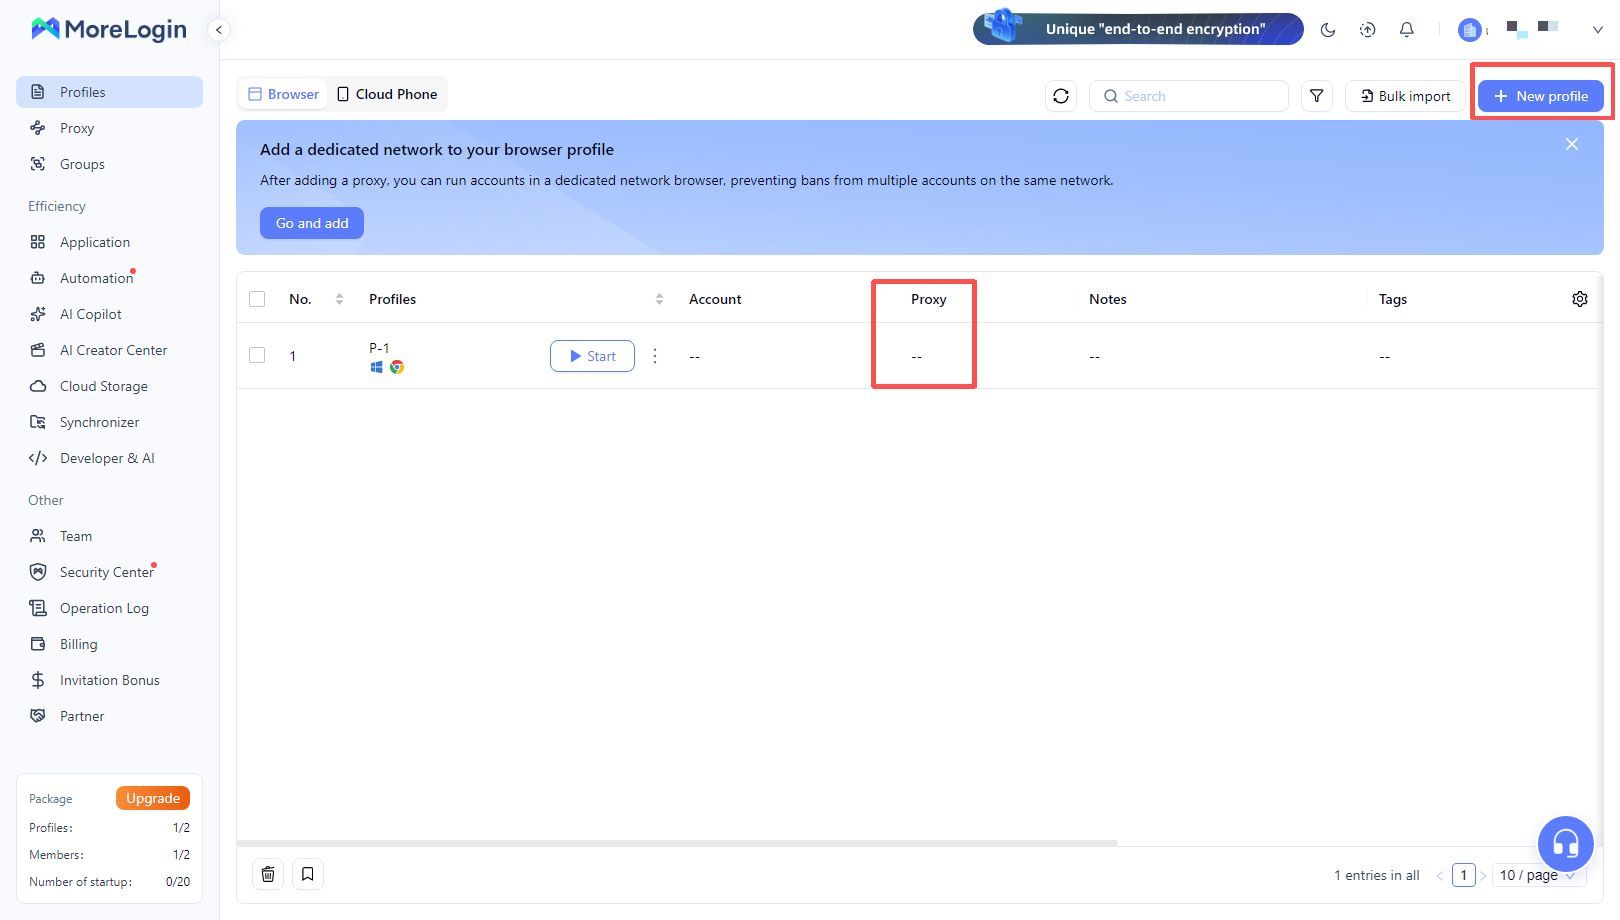
2.2 Scroll to the Proxy section. Select New Proxy → choose the proxy type → enter the connection details from IPDEEP. You can also select an existing proxy.
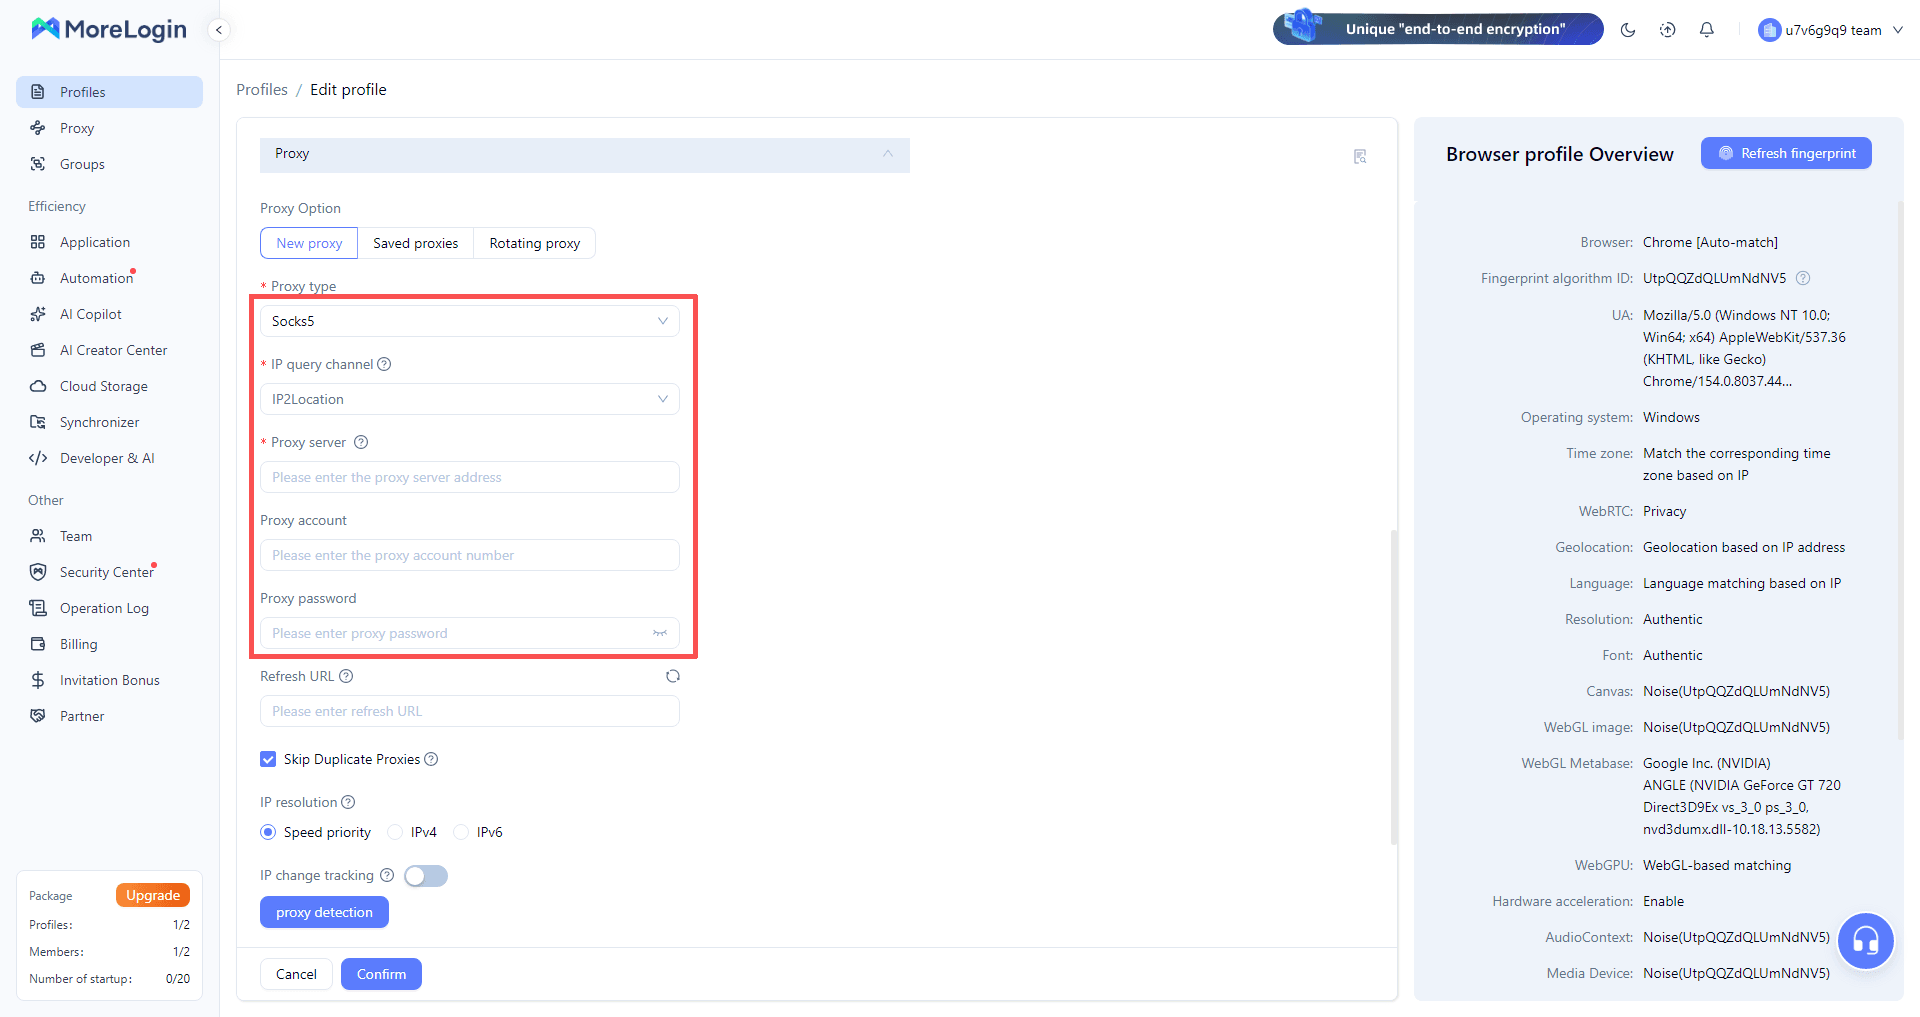
2.3 After entering the proxy details, run the proxy check to verify that MoreLogin can connect.

2.4 Click Done. Find the profile you just configured in the profile list and click Start to browse through your IPDEEP proxy.
Frequently Asked Questions
Q1. Which proxy type should I select for a new MoreLogin profile?
Select New Proxy and choose a protocol supported by your IPDEEP plan, such as HTTP, HTTPS, or SOCKS5. If MoreLogin offers a formatted paste option, you can paste the full connection string. The app will usually fill in the fields automatically.
Q2. Why did the proxy connection test fail?
Check that the host, port, username, and password are correct and that the protocol matches your plan. Confirm that the proxy is still active and, if your plan has a traffic allowance, that you have data left. If the test still fails, check the proxy’s status in the IPDEEP dashboard.
Q3. Does each browser profile need its own IP address?
If you manage multiple accounts, consider assigning a separate IP address to each profile. This keeps distinct accounts from sharing an exit IP and reduces the chance that they’ll be linked based on that address.
Q4. Can I create MoreLogin profiles and assign proxies in bulk?
Yes. MoreLogin supports bulk browser profile creation and bulk proxy imports, which helps when setting up several accounts and exit IPs at once. Check your version of the app for the available options.
Q5. Do I need a connection outside mainland China before using IPDEEP proxies?
Yes. All IPDEEP proxies require an internet connection outside mainland China. IPDEEP provides the proxy exit IP, and customers set up the underlying internet connection themselves.