

How to Set Up IPDEEP Proxies in MuLogin



Clean IP picks: Static IPs from $1.5 each, Dynamic IPs from $0.5/GB


Setting Up IPDEEP Proxies
This guide walks you through the basic process of signing in to IPDEEP and purchasing and using proxy IPs.
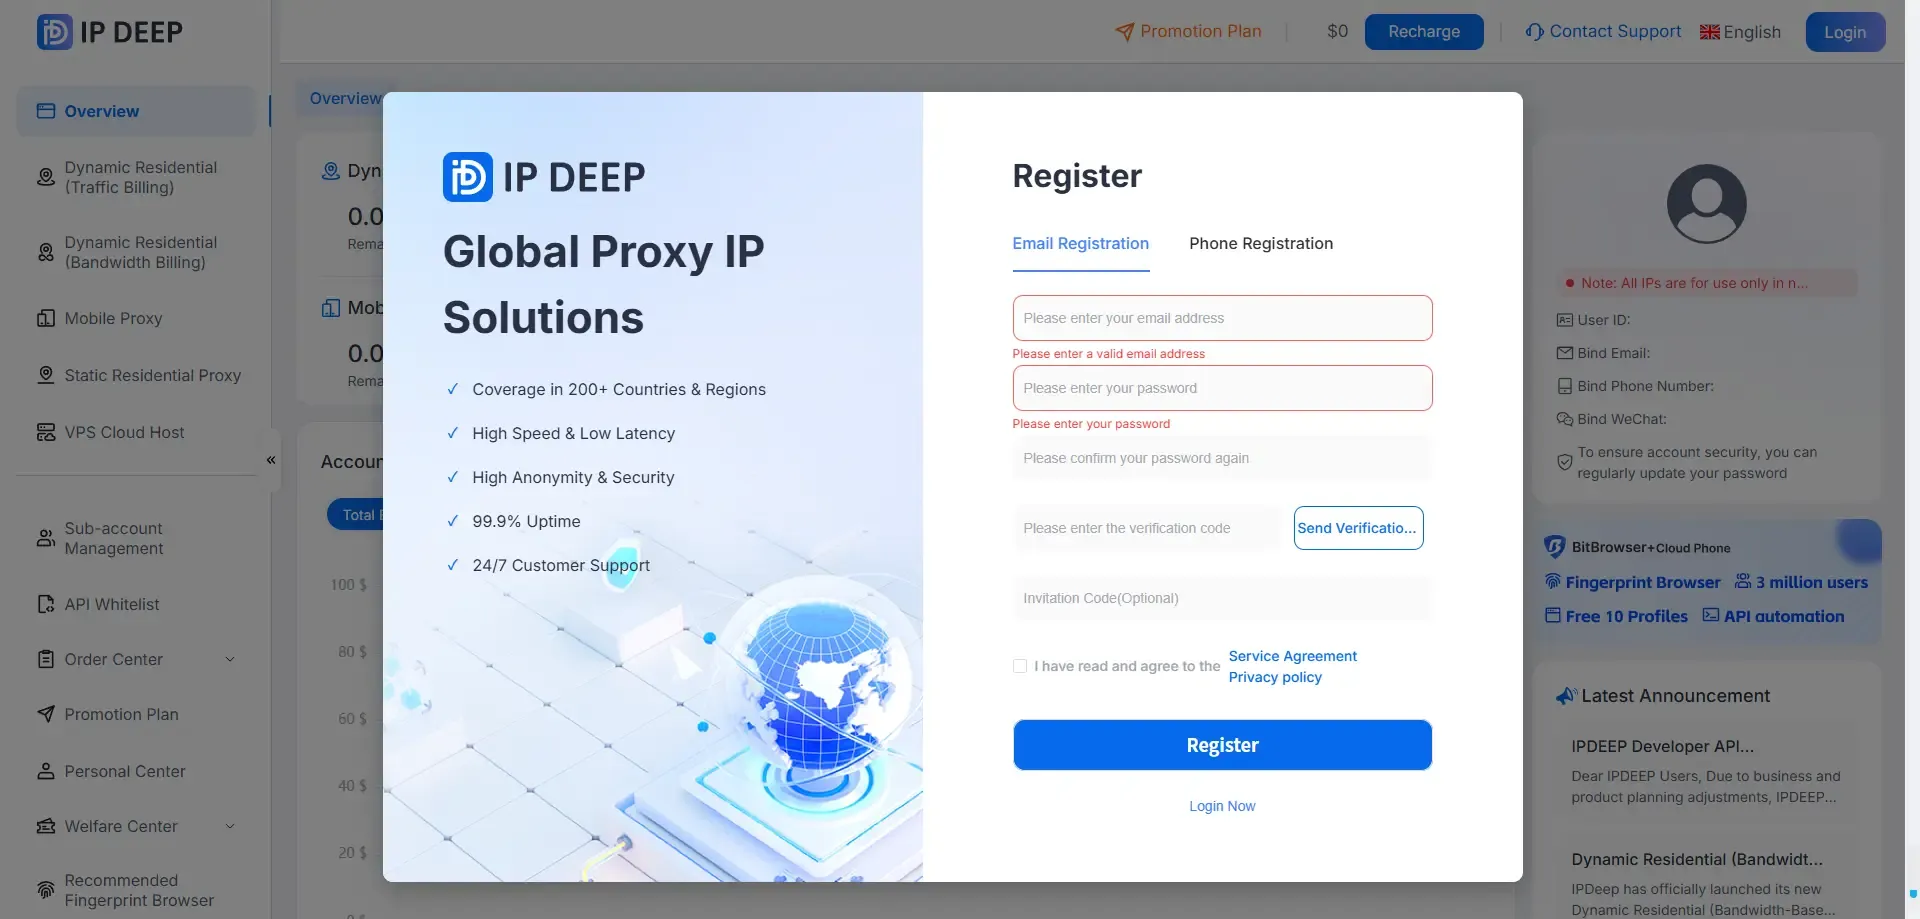
1. Create an IPDEEP Account
Visit the official IPDEEP website and create an account. You can sign up using an email address, Google account, or phone number.
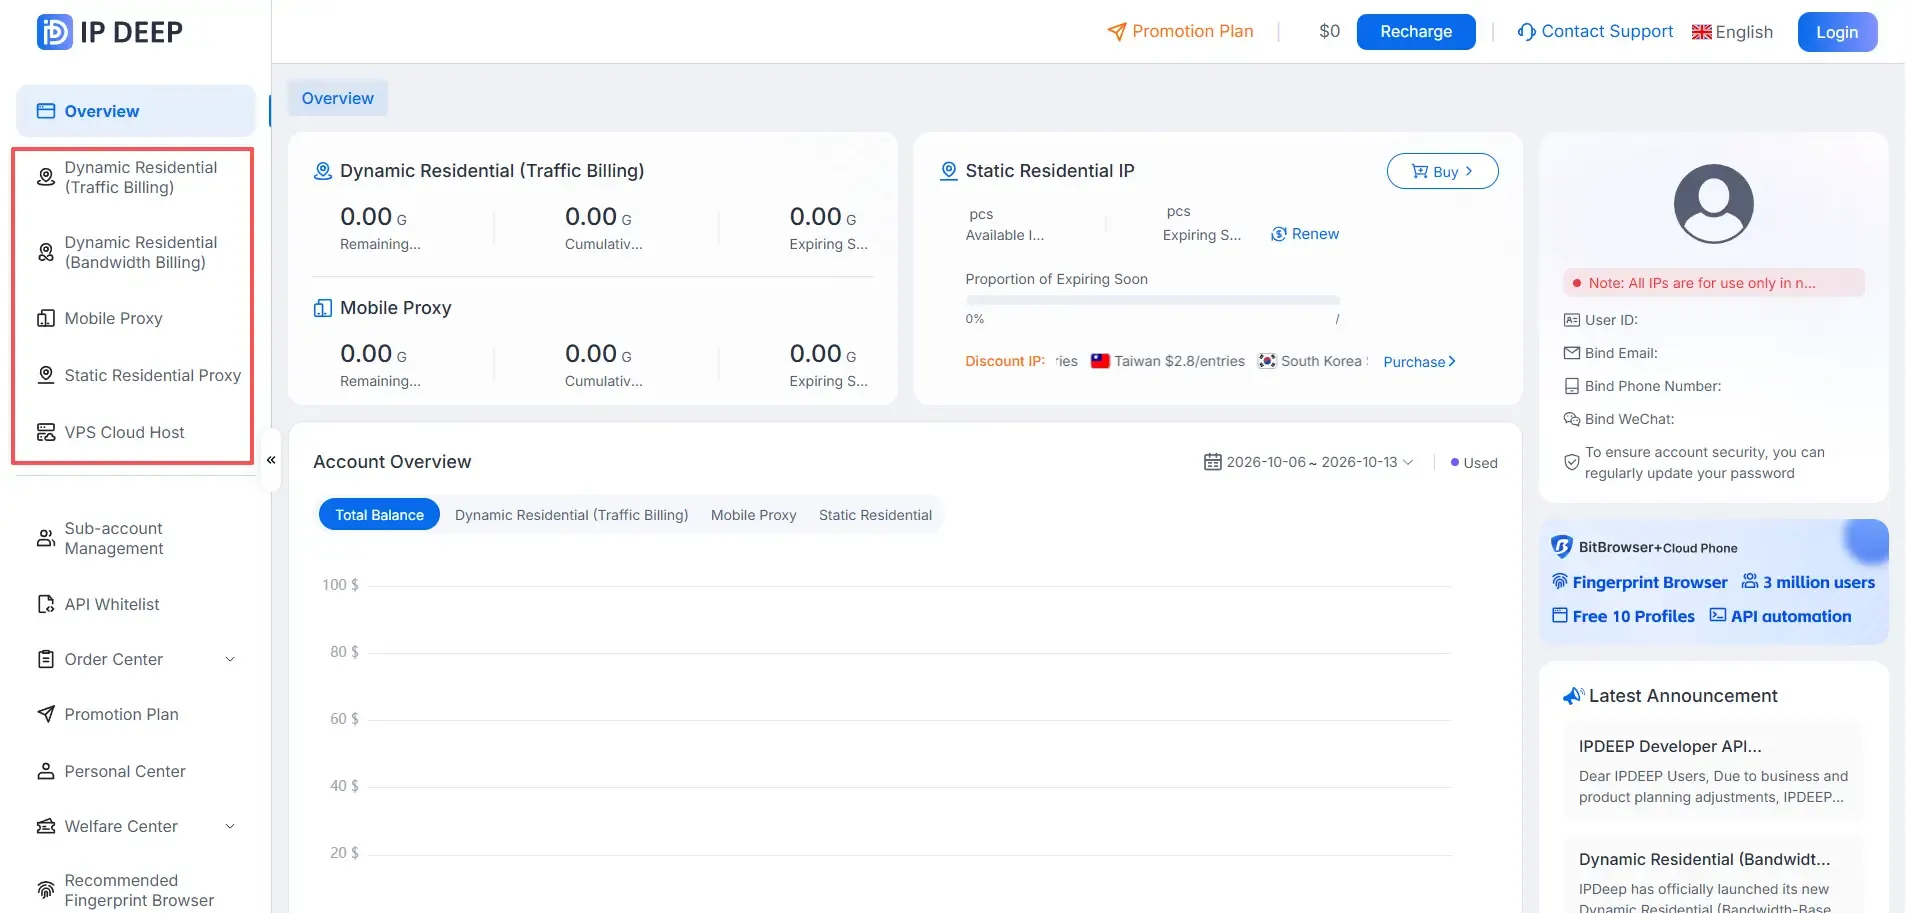
2. Log In and Choose a Proxy Type
Log in to your account and select the type of proxy you want to purchase.
IPDEEP offers static residential proxies, dynamic residential proxies, unlimited residential proxies, and mobile proxies.
3. Claim Your Welcome Benefits
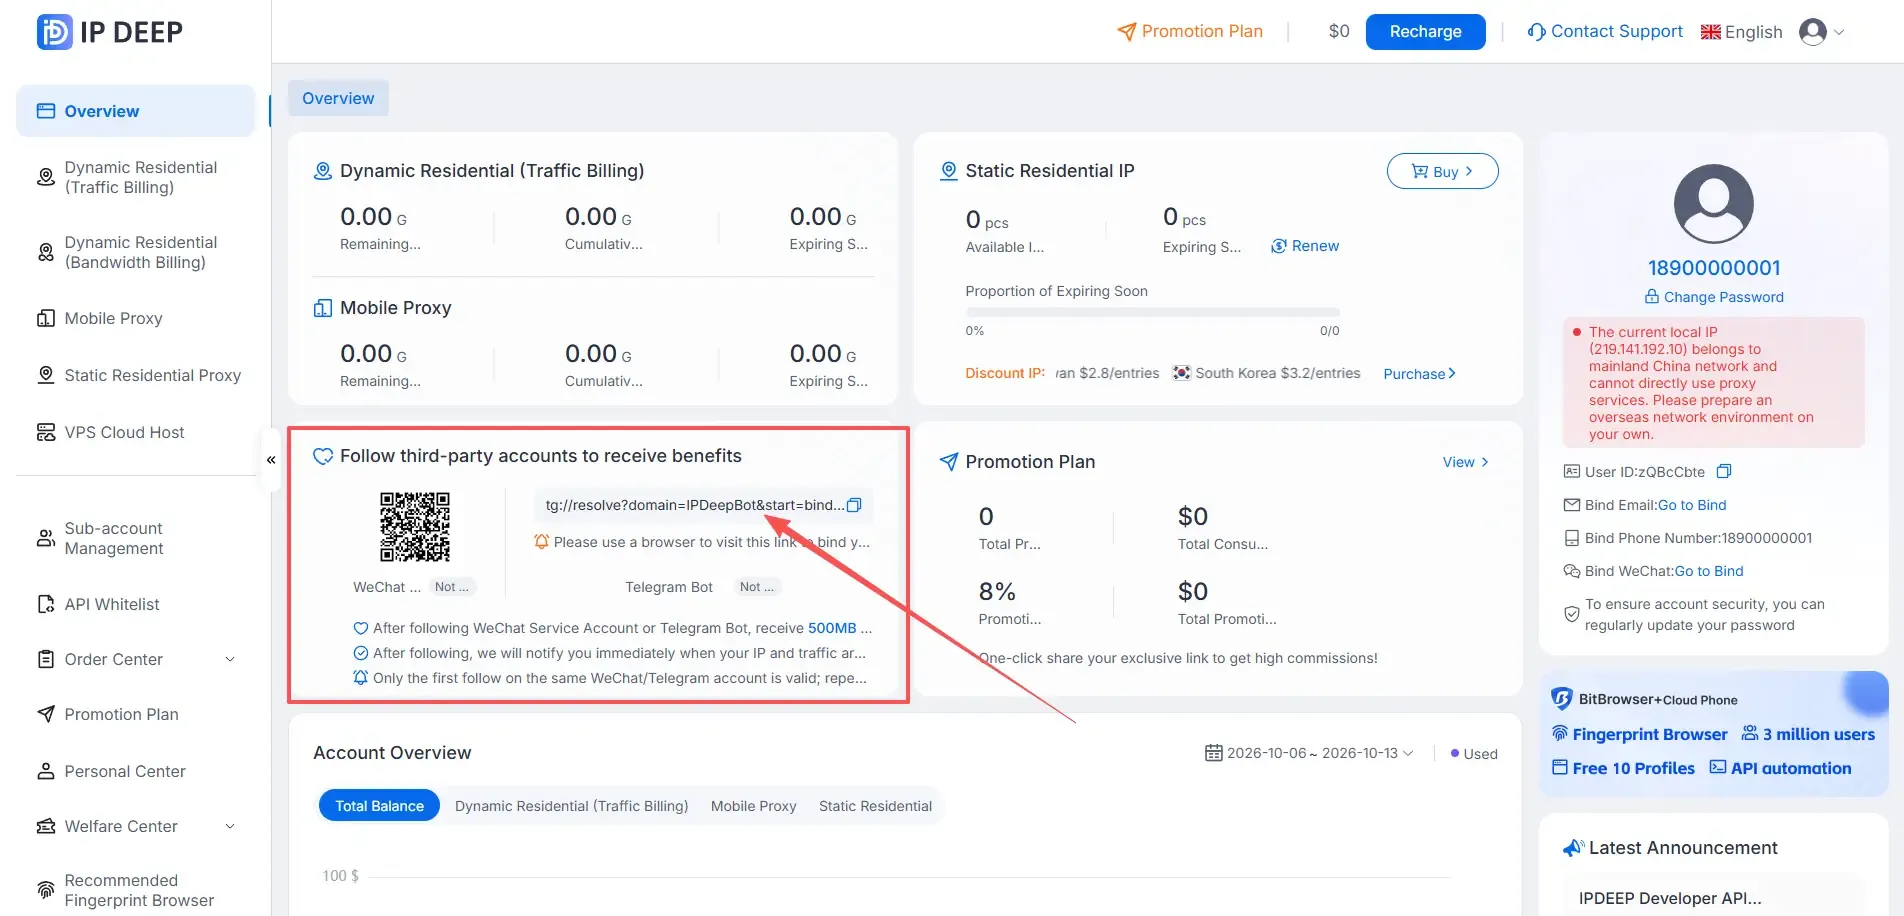
After logging in, follow one of IPDEEP’s official channels, such as its WeChat service account or Telegram bot, to claim 500 MB of dynamic proxy traffic or a $2 coupon. The coupon can be applied directly to a proxy purchase.
4. Purchase a Static Residential Proxy
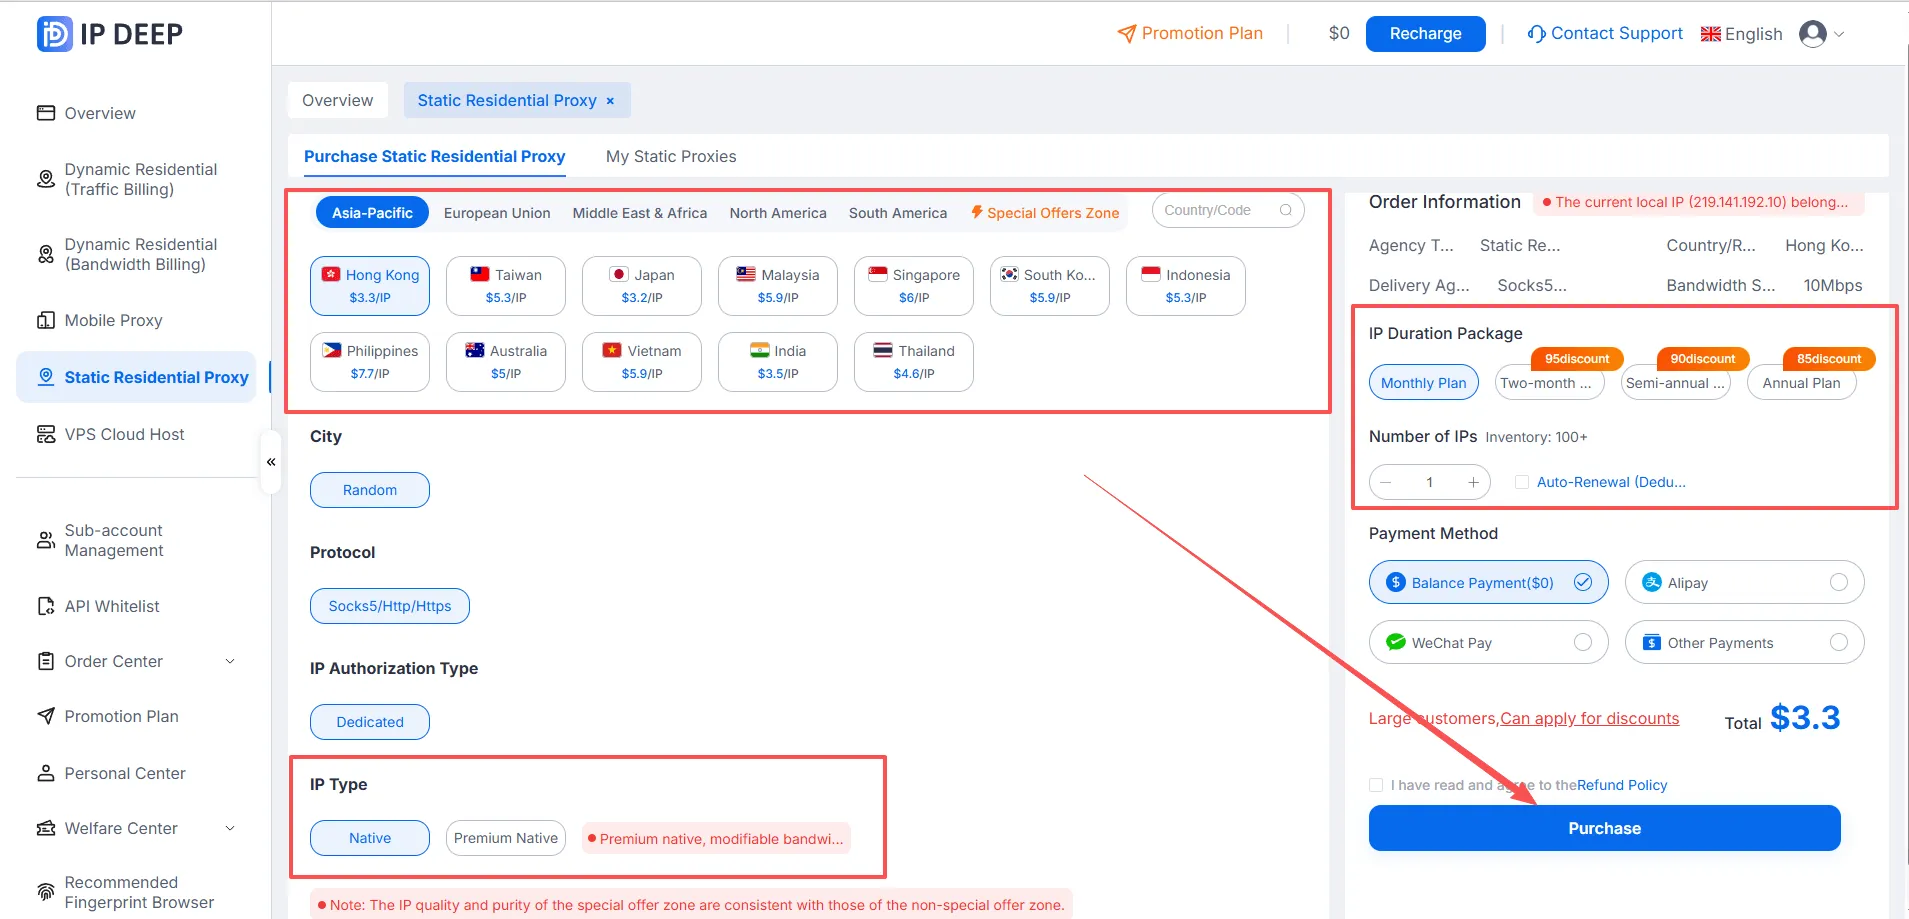
For this example, we’ll use a static residential proxy. Select a country or region > choose an IP type (Native or Premium Native) > select a subscription period > choose a payment method > click Purchase.
5. Retrieve Your Proxy Connection Details
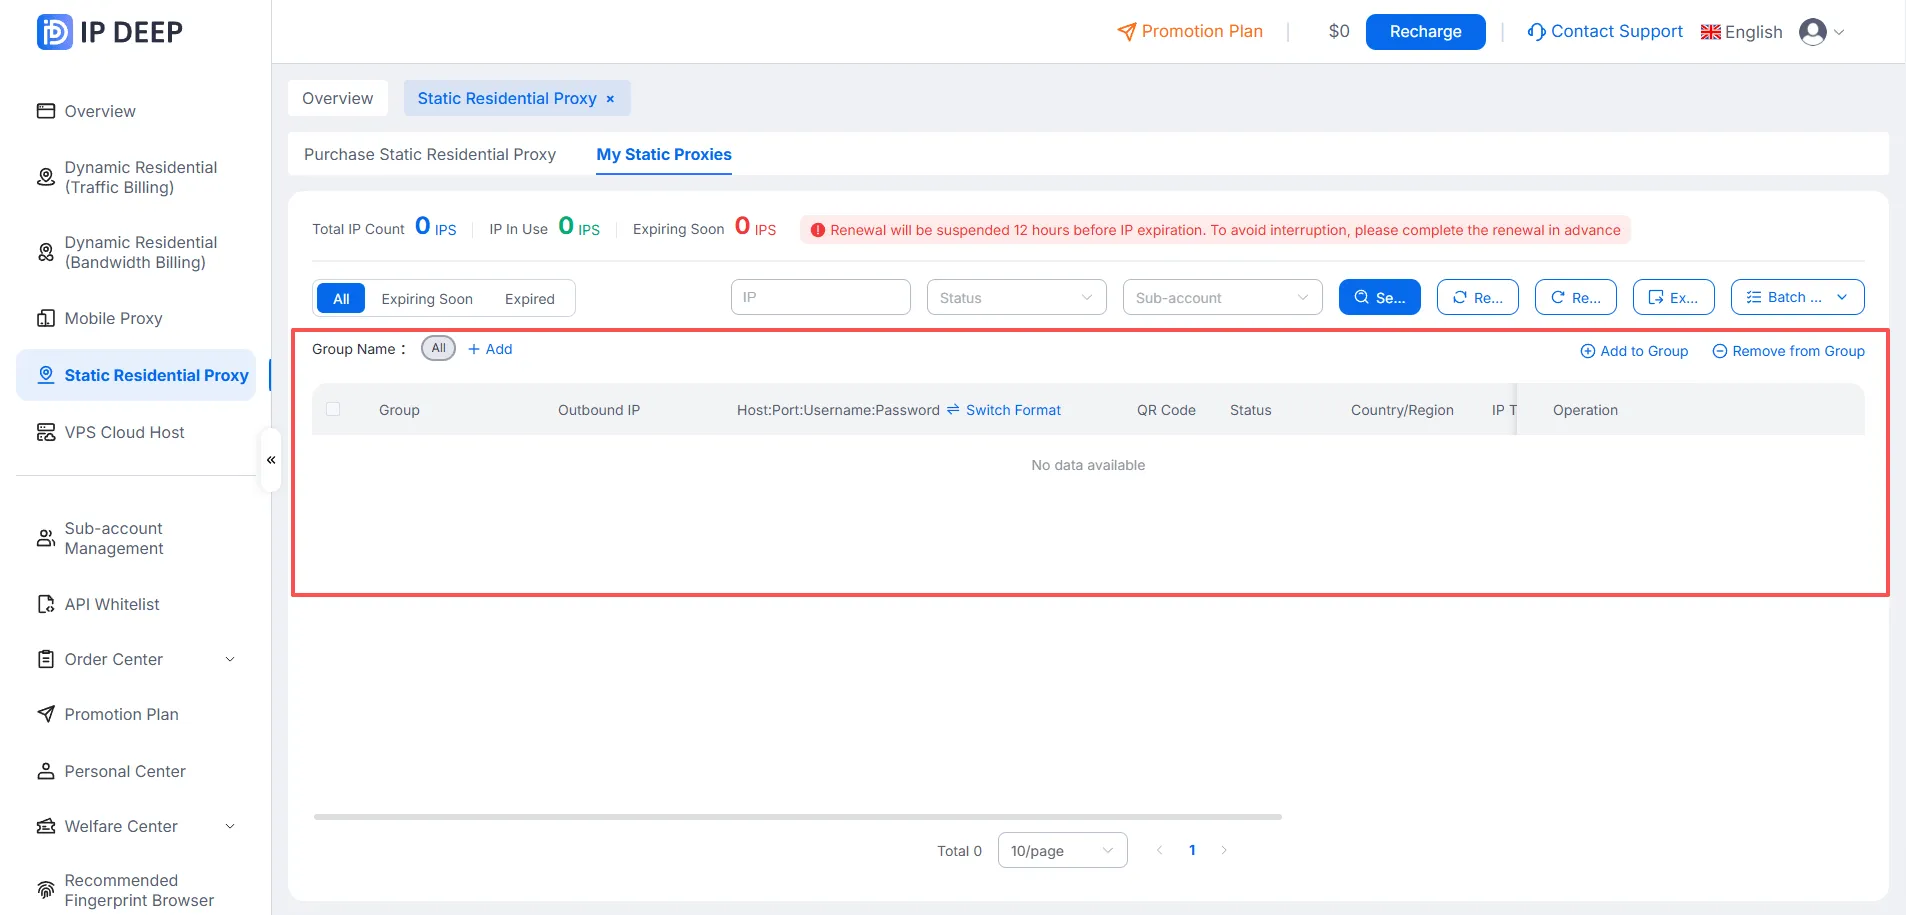
After your purchase is complete, go to the Purchased Static Residential Proxies page to find your connection details in the following format: “Host:Port:Username:Password”.
That’s it! You’ve completed the basic process of purchasing and setting up a proxy through IPDEEP. The steps are similar for other proxy types.
Configuring Proxies in the MuLogin Antidetect Browser
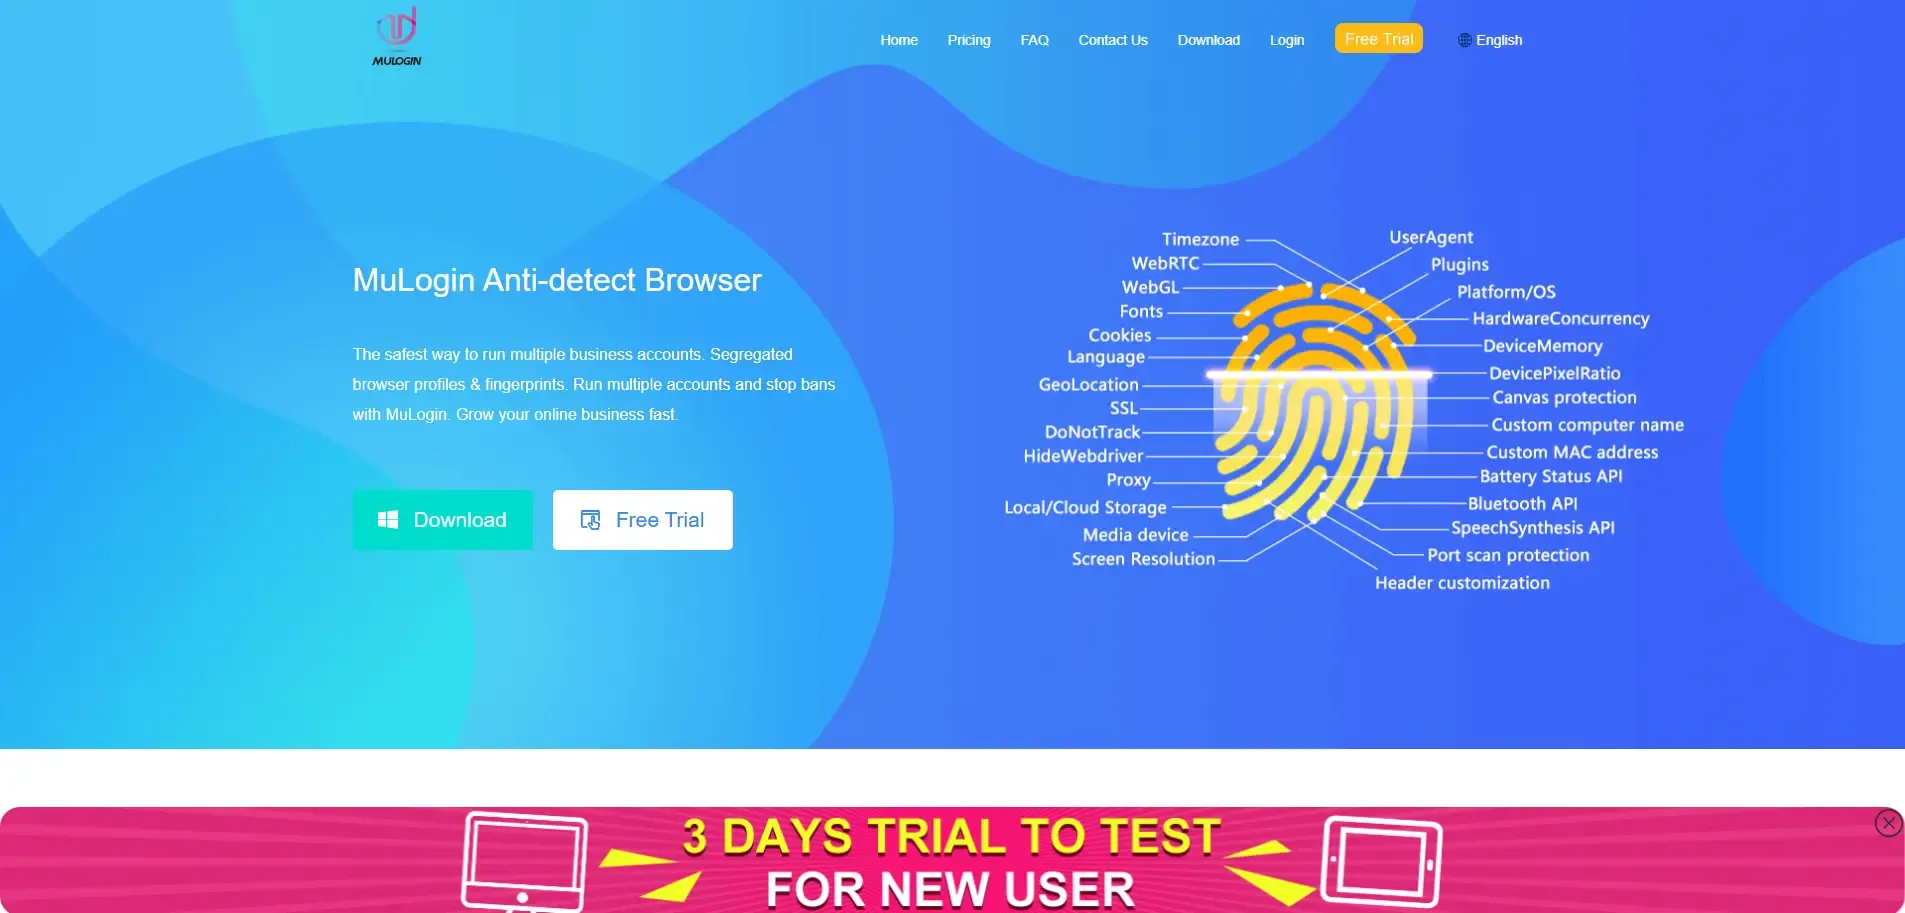
1. Visit the MuLogin Website and Download the Browser
Note: MuLogin offers a free trial. Visit https://www.mulogin.com/?ref=ipdeep to get started.
2. Add a Browser Profile and Configure the Proxy
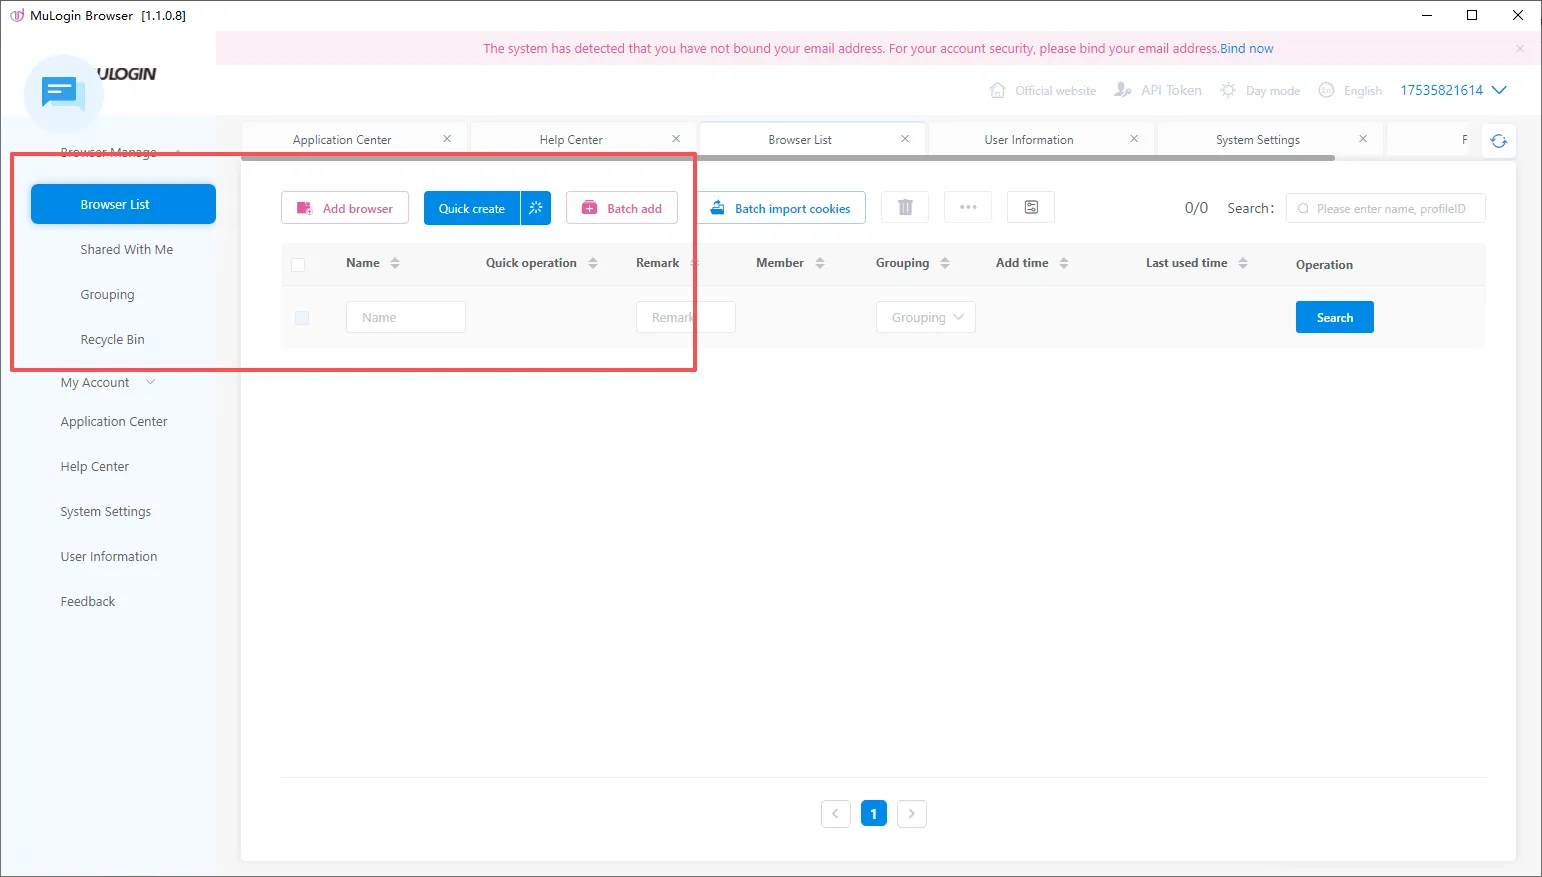
After installing the MuLogin client, go to Browser List and click Add Browser. In the pop-up window, configure the browser profile and proxy details. Once you’ve finished, click Check Network to test the proxy connection, then save your settings. Follow the steps below:
2.1 Open the MuLogin client. Under Browser List, click Add Browser or Quick Create to create a browser profile.
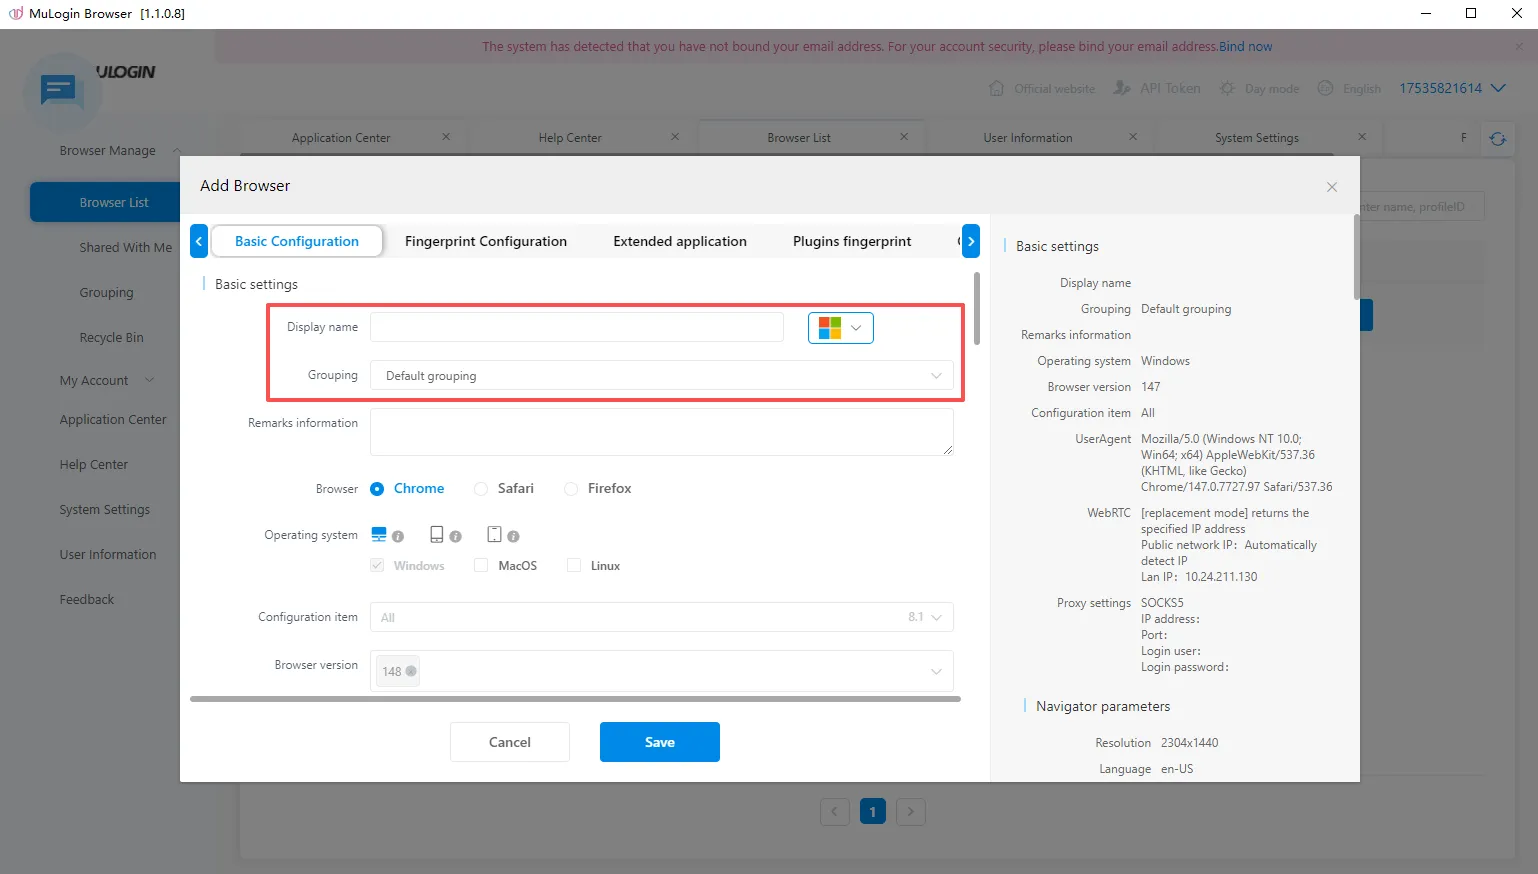
2.2 Click Add Browser and enter a name for the profile.
2.3 In Basic Settings, scroll down to Proxy Settings. Select the protocol that matches the proxy you purchased from IPDEEP, then enter your proxy details. You can also paste the proxy information in the supported format.
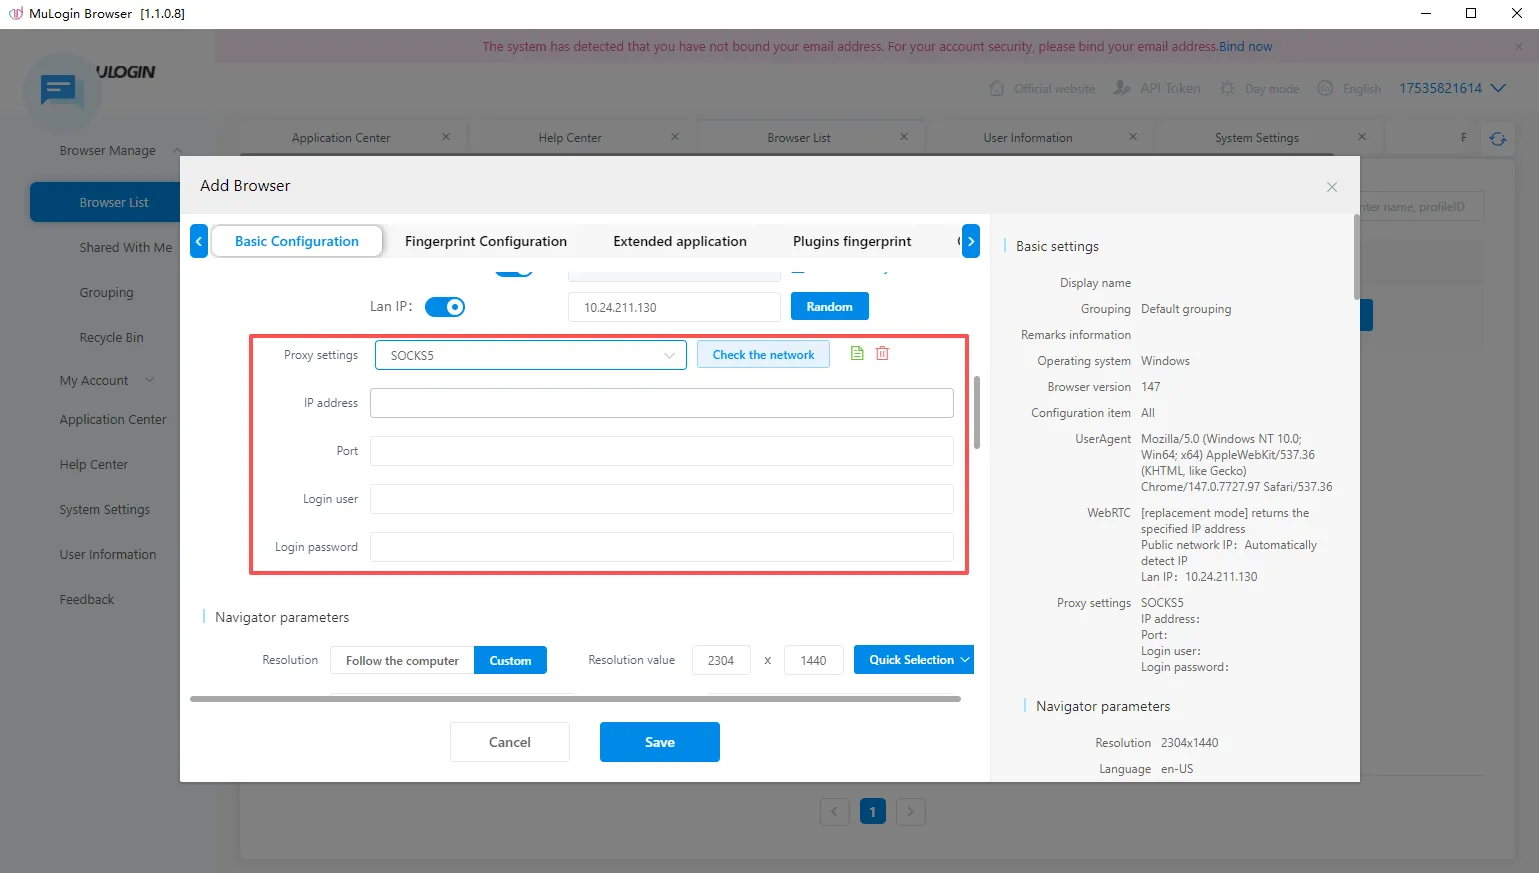
2.4 Enter your proxy details and click Check Network to test whether the proxy IP is reachable.
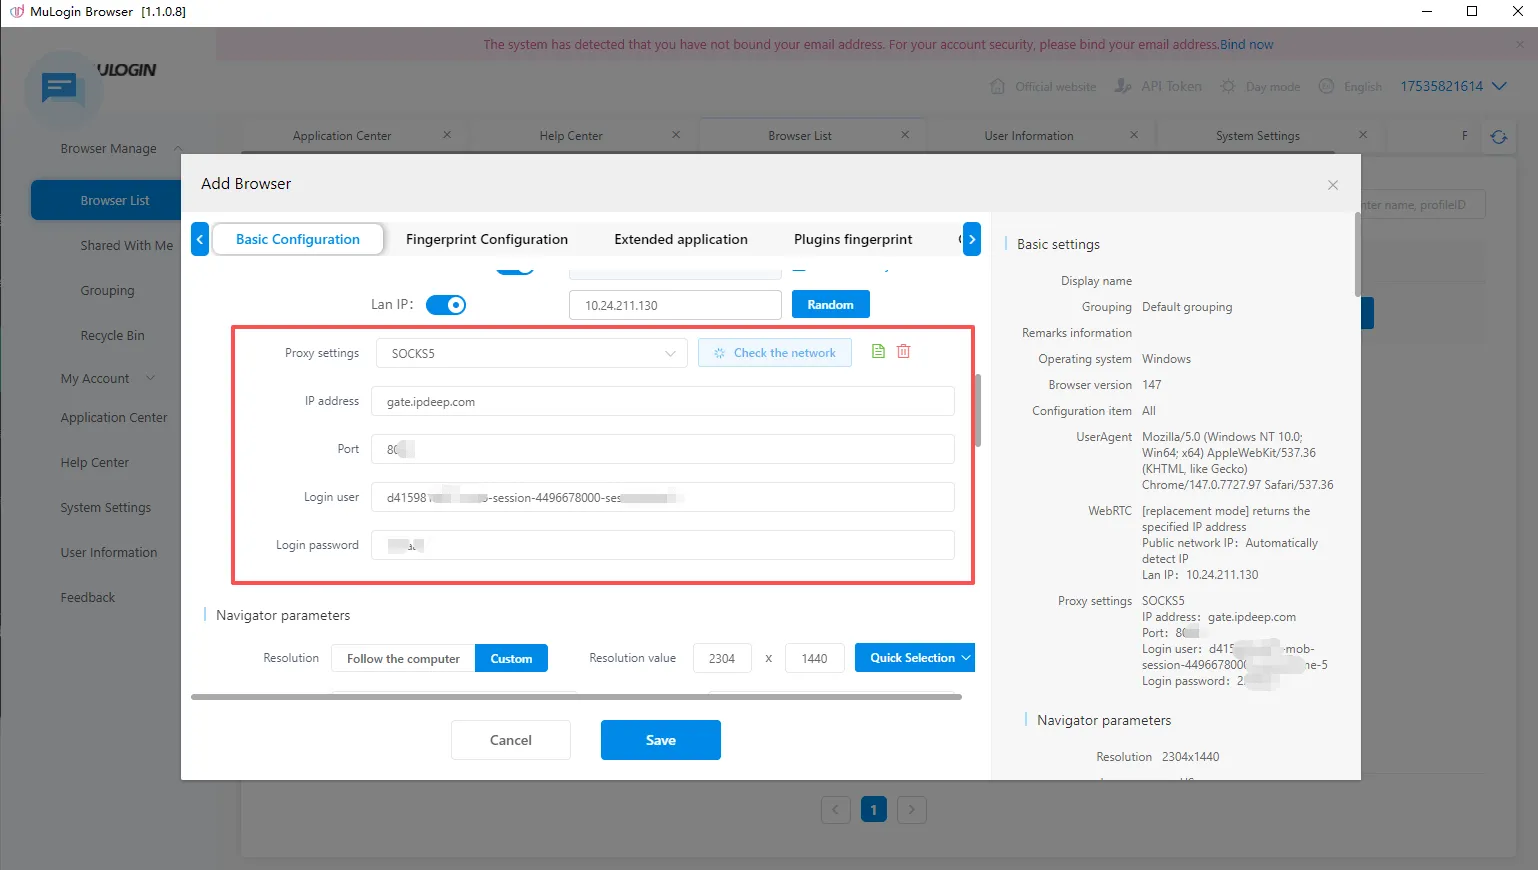
2.5 Click Save. Your newly configured profile will appear in Browser List. Click Open to launch it and start browsing with your IPDEEP proxy.
You’re all set! Your IPDEEP proxy is now configured in the MuLogin antidetect browser.
Frequently Asked Questions
Q1: Why does the proxy connection test keep failing after purchase?
First, check that you’ve entered all four connection details correctly: host, port, username, and password. Make sure none are missing and that the selected protocol (HTTP, HTTPS, or SOCKS5) matches your proxy plan.
Next, confirm that your device is connected to an overseas network and check whether the proxy has expired or its traffic allowance has been used up.
If the connection still fails, check the IP status in your IPDEEP dashboard or contact customer support for assistance.
Q2: Which protocols does IPDEEP support, and how do I choose one?
IPDEEP proxies support three protocols: HTTP, HTTPS, and SOCKS5.
Select the protocol included in your purchased plan when configuring the proxy. In most cases, choosing the Paste Proxy in Format option allows the software to recognize the connection details automatically.
SOCKS5 is often a better fit for scenarios that require remote DNS resolution. However, the right choice depends on the product specifications and your actual use case.
Q3: Can I use the same proxy IP in multiple browser profiles at the same time?
We don’t recommend assigning the same IP to multiple browser profiles that need to maintain separate identities. Doing so may create network-related signals that link the accounts.
When managing multiple accounts, it’s generally better to assign a separate IP and browser profile to each account to maintain greater isolation between browsing environments.
Q4: Do I need to set up an overseas network before using IPDEEP proxies?
Yes. All IPDEEP proxy products must be used in an overseas network environment, which customers are responsible for configuring.
A proxy IP does not route your local network overseas by itself. It provides an overseas exit IP for your network connection.
Q5: What’s the difference between static residential, dynamic residential, and unlimited residential proxies?
Static residential proxies provide a fixed exit IP throughout the subscription period. They are suitable for account management that requires a consistent IP over time.
Dynamic residential proxies support IP rotation based on requests or time intervals, making them suitable for data collection, monitoring, and bulk access tasks.
Unlimited residential proxies are billed based on bandwidth and subscription duration. They are suitable for continuous tasks with high bandwidth requirements. Each type serves a different purpose, so choose according to your actual needs.
Q6: Where can I find my proxy connection details after purchase?
After completing your purchase, open the Purchased section for the relevant product in your dashboard. You’ll find the connection details in the format “Host:Port:Username:Password”.
Enter all four details in your browser or software’s proxy settings, then test the connection. The process is similar for other proxy types.