
How to Set Up Browser Proxy? Detailed Tutorial Here!
In daily browsing, cross-border e-commerce operations, data collection, or account management, many people come across the concept of "proxy IP." However, when it comes to the actual operation, the most common question is:
How should I set up a browser proxy?
This article will start with the basic principles, explain in detail how to set up proxies on different systems and browsers, and teach you how to check if the configuration is successful, helping you understand it all at once.
What is a Browser Proxy?
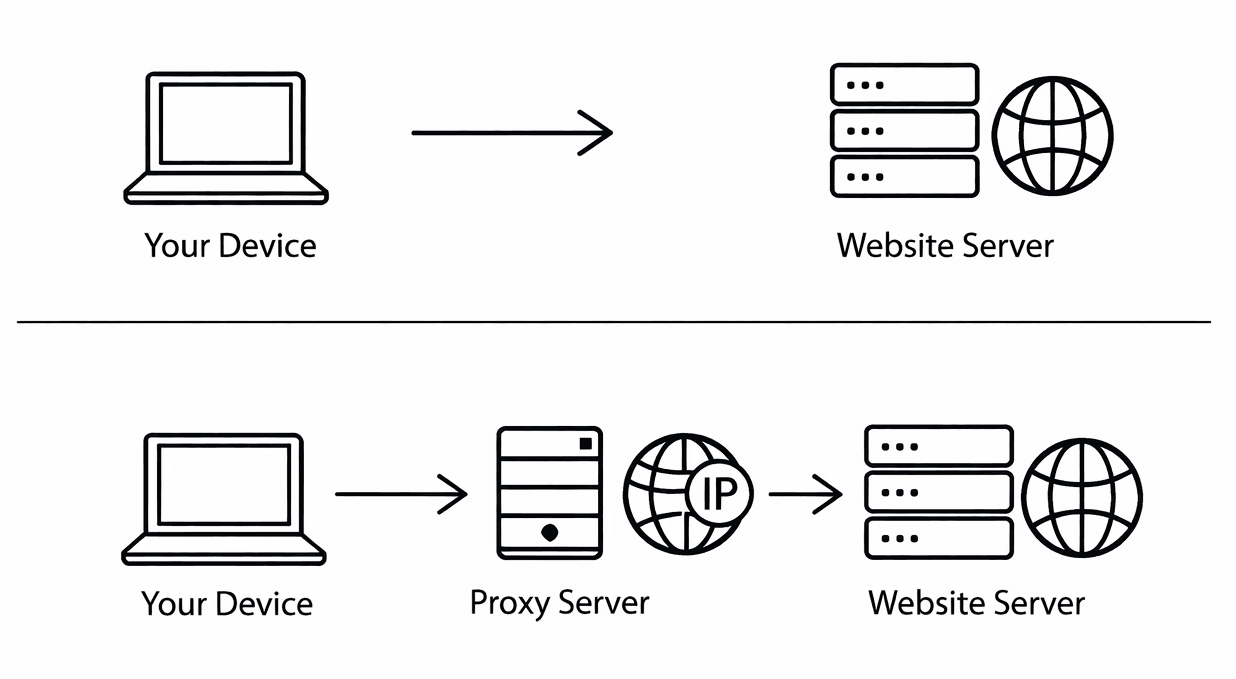
A browser proxy essentially routes your network requests through an "intermediate server."
Under normal circumstances:
Your computer → Target website
After using a proxy:
Your computer → Proxy server → Target website
In this way, the website sees the proxy IP address instead of your real IP address.
Windows System Browser Proxy Setup Steps
Chrome/Edge Proxy Setup Steps
Chrome and Edge use the system proxy settings by default, so you only need to configure it in the system.
1. Open System Settings
Click the Start menu → Go to "Settings"
2. Go to Network Settings
Select "Network and Internet" → Click "Proxy"
3. Enable Manual Proxy
In the "Manual Proxy Setup" section:
Turn on "Use a proxy server"
Enter the proxy IP address
Enter the port number
If the proxy requires a username and password, the browser will prompt for authentication the first time you access a webpage.
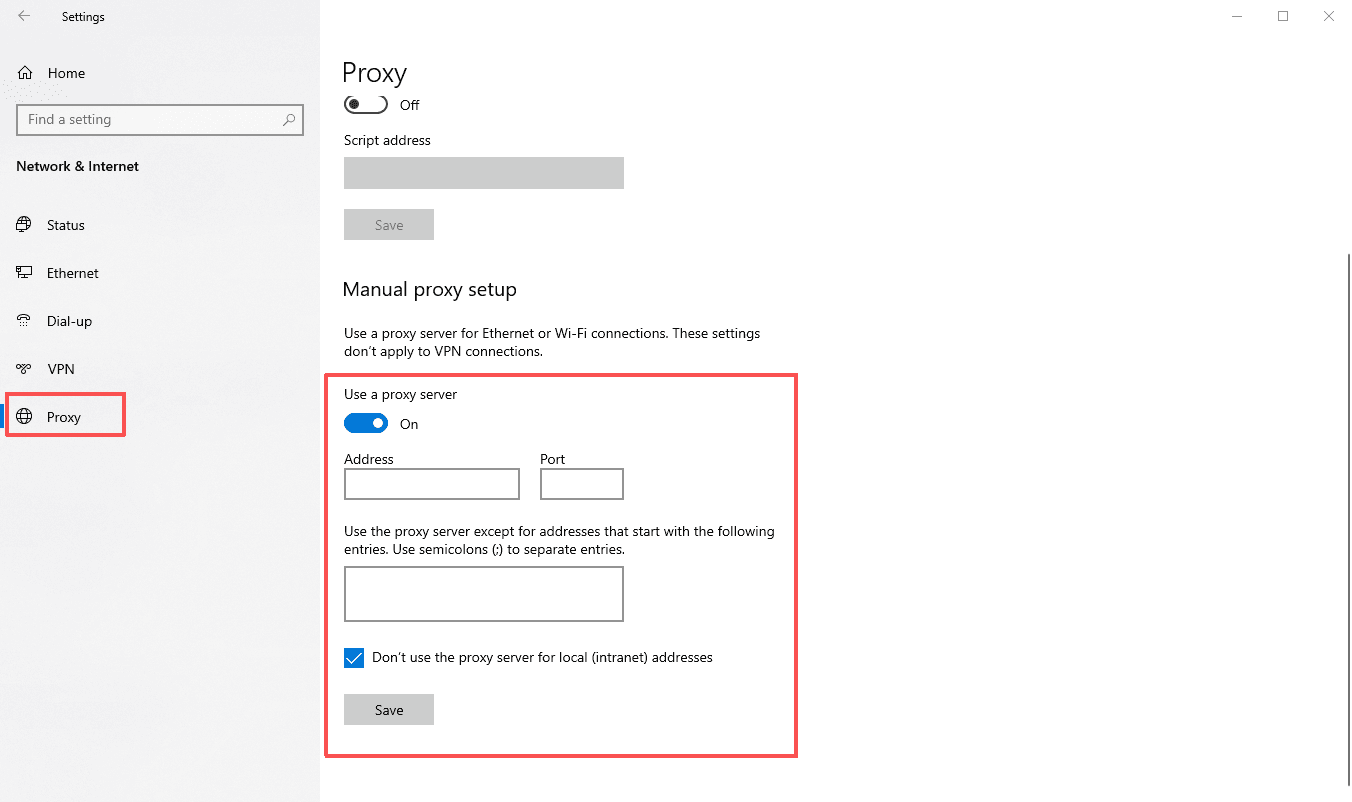
4. Click Save
After saving, reopen the browser to apply the settings.
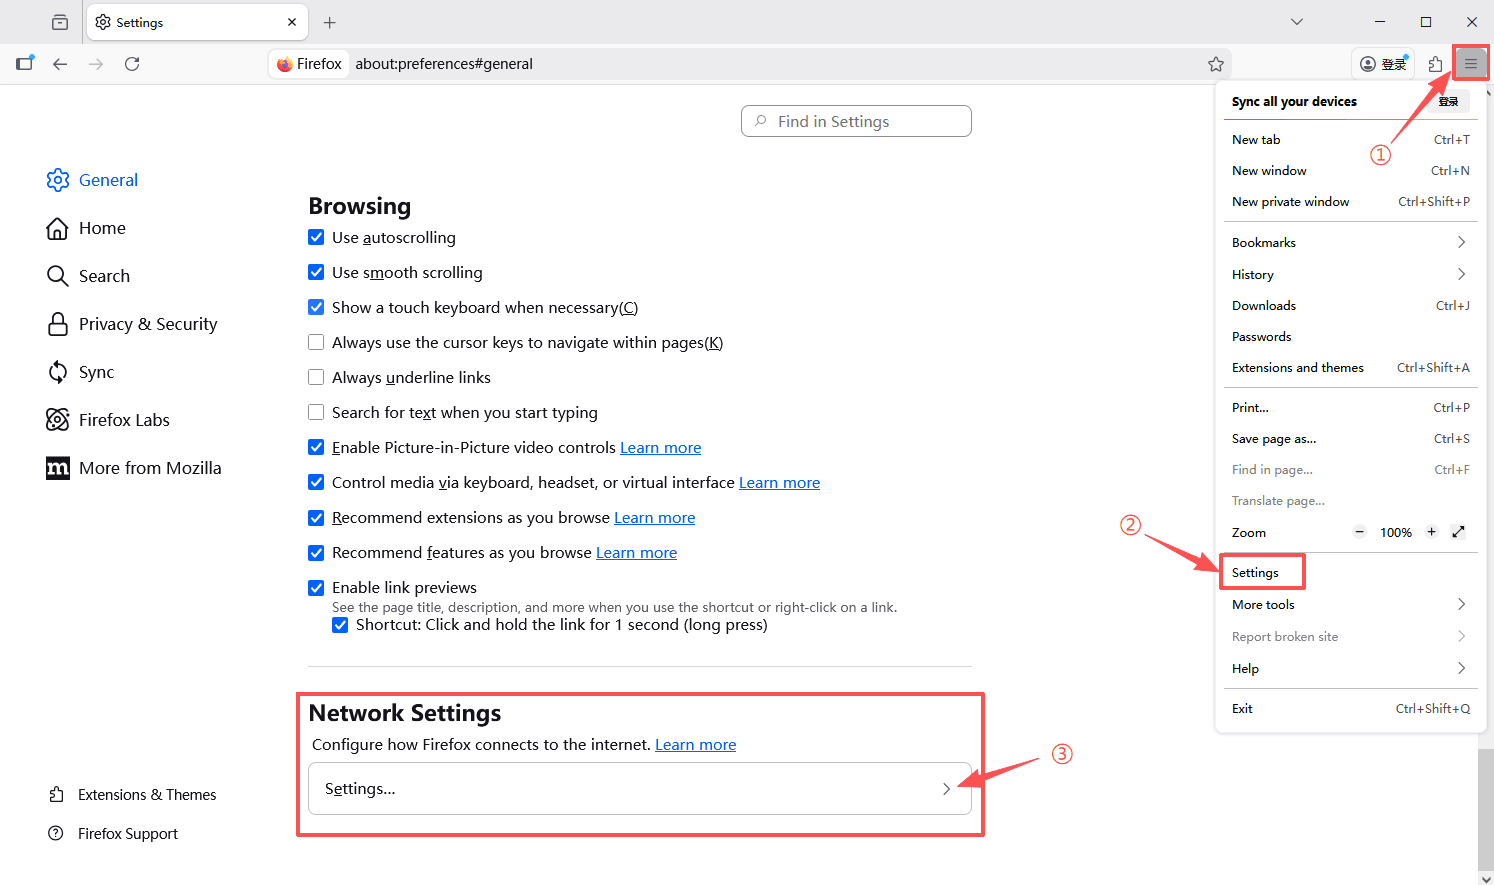
Firefox Proxy Setup Steps
1. Open Firefox, click the three-line menu in the upper-right corner, and select "Settings."
2. In the "Network Settings," select "Settings...".
3. Select "Manual proxy configuration" and enter the proxy server's IP address and port.
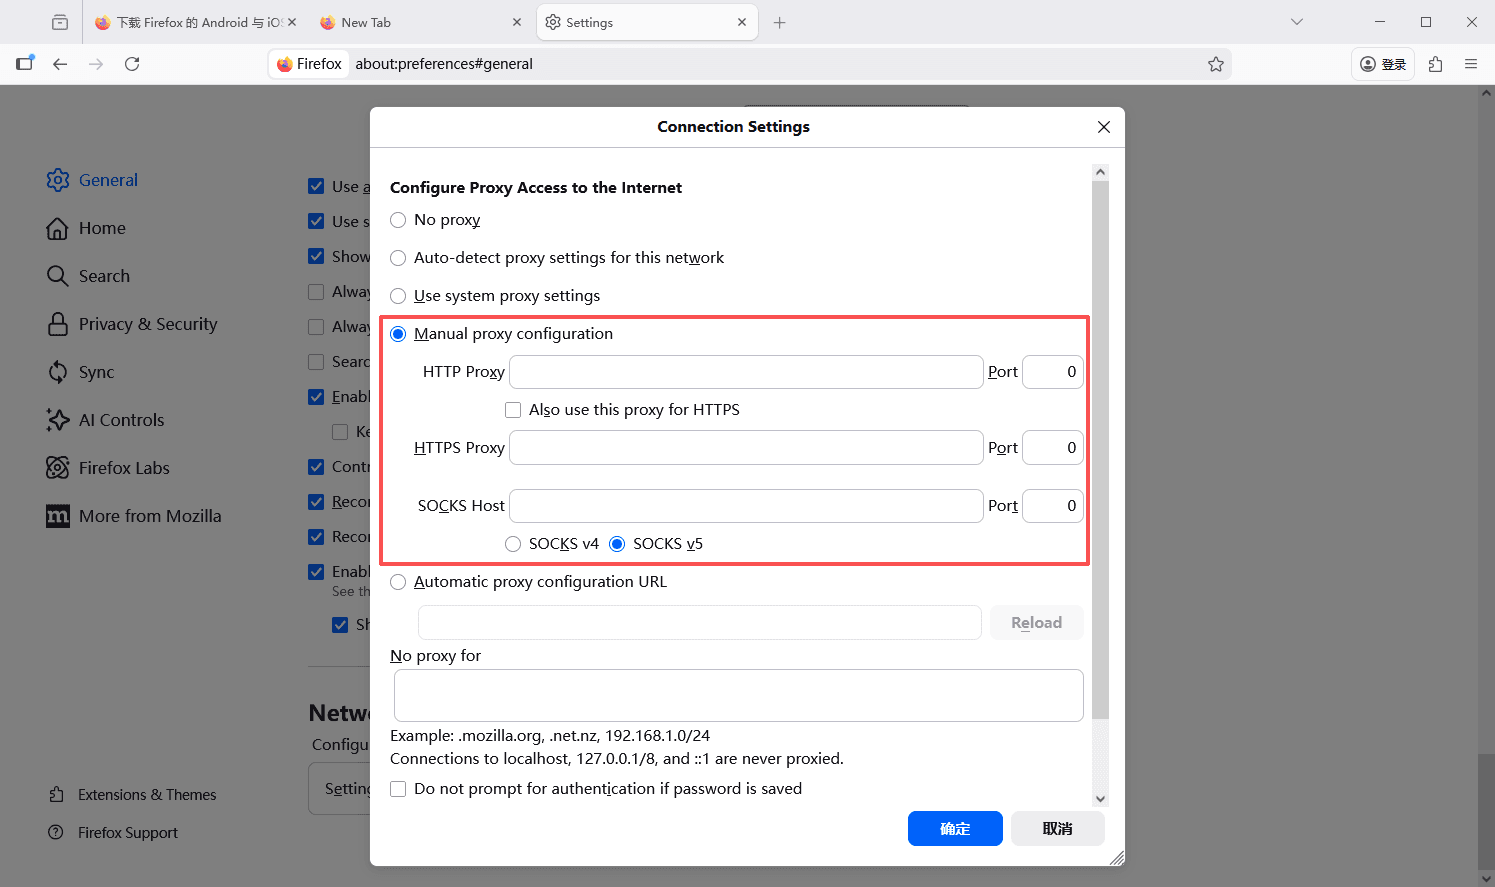
4. Save the settings
Mac System Browser Proxy Setup Steps
Setup Process:
1. Click the Apple icon and open "System Preferences"
2. Click "Network"
3. Select the current network in use (Wi-Fi or wired)
4. Click "Advanced"
5. Go to the "Proxies" tab
Choose the proxy type:
Enter the IP address and port, and if required, check "Proxy server requires a password" and enter your username and password.
6. Click "OK" to complete the setup.
Using Browser Extensions to Set Proxy
If you need to frequently switch IPs, it's recommended to use a browser extension.
Read: SwitchyOmega Guide: Proxy Configuration and Alternatives-IPDEEP
Setup Process:
1. Install the extension from the browser extension store
2. Open the extension and create a new proxy configuration
3. Enter the IP address and port
4. If there is a username and password, enter the authentication details.
5. Enable the proxy mode.
How to Confirm Proxy is Set Up Correctly?
Detection Method:
1. Open the browser
3. Check the displayed IP address
If the IP shown is the proxy IP instead of your local IP, it means the configuration was successful.
Additionally, it is recommended to check:
Whether the IP country is correct and if there are any DNS leaks.
Common Issues
1. Can’t access the internet after setting up?
Possible reasons: Incorrect IP or port, proxy server unavailable, firewall blocking. It’s advised to contact the proxy provider for confirmation.
2. Can multiple accounts share one IP?
Not recommended. Sharing an IP among multiple accounts may lead to them being identified as related environments, especially on e-commerce platforms where the risk is higher.
3. Which is better, Dynamic IP or Static IP?
Static IP: Suitable for long-term account binding; Dynamic IP: Ideal for short-term tasks or data scraping.
Conclusion
Setting up a browser proxy isn’t complicated. The key points are: accurately filling in the IP information, checking the configuration after setup, and choosing the appropriate method based on the scenario. Once the proxy environment is stable, your network operations will be more secure, controllable, and efficient.
IPDeep provides high-quality proxy IPs, including:
And many other types of proxies, with over 10 million high-quality IP resources covering 200+ countries and regions worldwide. Create an account now and try our proxy services for free!